How to Replace a Kitchen Tap
25 July 2026 Joe HartleyIntermediate1–2 hours3 comments
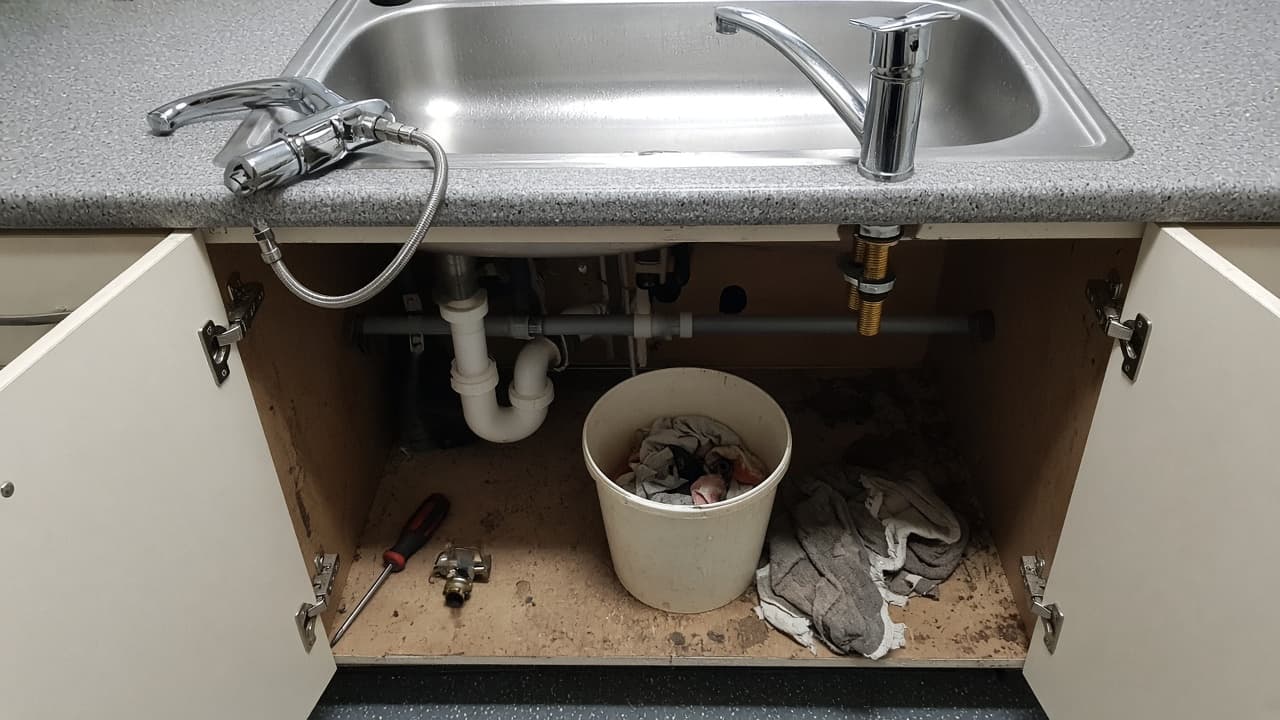
Tools
- Basin wrench or adjustable spanners
- PTFE tape
- Bucket and towels
- Torch
- New kitchen mixer tap
- Flexible tap connectors (if not supplied)
Replacing a kitchen tap is mostly about access under the sink and getting the deck fixing tight without twisting the new body. Measure the hole, match hot/cold tails, and work methodically in a cramped cupboard.
Measure twice, clear the cupboard once
Check the sink hole size (commonly 35 mm for monobloc) against the new tap’s spec. Confirm isolating valves on hot and cold; without them you will be on the stopcock for longer. Clear the cupboard and put a bowl under the connections. A dripping old tap is fine to replace, but isolation still comes first.
Buying a complete tap with flexible tails saves a second trip. Keep a spare pair of sealing washers handy. Under-sink light is usually awful, so a head torch earns its keep.
What you will need
| Item | Notes |
|---|---|
| New monobloc mixer | Match hole size and deck thickness |
| Flexible connectors | Usually ½″ BSP; length to reach isolators |
| Basin wrench | For nuts you cannot reach with a normal spanner |
| PTFE tape | On tapered male threads if required by the fittings |
| Torch / head torch | Under-sink light is usually awful |
Step-by-step
1. Isolate and drain
Close both isolating valves. Open the tap to release pressure. Place the bucket under the tails.
2. Disconnect the old tap
Undo the flexible connectors from the isolators (or from the tap tails). Then undo the large fixing nut under the sink that clamps the tap to the deck. Lift the old tap out from above. Scrape off old sealant or rubber residue so the new base sits flat.
3. Prepare the new tap
Fit any supplied base gasket or sealing washer. Feed the tails and fixing stud through the hole. Have a helper hold the tap square from above while you work underneath if you can.
4. Clamp the tap to the sink
From below, fit the horseshoe plate and nut (or whatever the manufacturer supplies). Tighten until the tap does not rotate. Keep it snug, not crusher-tight on a thin stainless sink.
5. Connect hot and cold
Join the flexible tails to the isolators: hot to hot, cold to cold. Hand-tighten plus a short spanner turn on compression fittings; follow the instructions for push-fit. Do not kink the flexis.
6. Test thoroughly
Open the isolators slowly. Check every joint with a dry tissue. Run hot and cold, then the mixer. Watch under the sink for five minutes. Slow weeps show up late.
Common mistakes
- Cross-threading flexible connectors onto isolators.
- Forgetting the deck gasket and getting a weep around the base.
- Over-tightening on a stainless sink and dimpling the metal.
- Buying a tap for a 2-hole sink when you only have one hole (or vice versa).
When to call a plumber
Get help if pipes are corroded copper with no isolators, if you need to cut and solder new tails, if the sink deck is cracked, or if you are on a shared supply you cannot isolate cleanly. A plumber is also wiser if asbestos-backed worktops or awkward boxing-in block access.
If you only need a repair, change a tap washer or fix a dripping mixer tap first. Flexis are usually part of this swap: how to replace flexible tap connectors, and how to remove a seized tap connector when a nut will not turn. Basin and bath versions sit alongside: replace a bathroom basin tap, replace a bath mixer tap.
FAQ
Do I need PTFE tape on flexible tap connectors?
Often the rubber washer does the sealing and PTFE is unnecessary or even unhelpful on the captive washer face. Use PTFE on tapered male iron threads where the fitting instructions call for it.
Can I reuse the old flexible hoses?
Only if they are in perfect condition and the correct thread. Perished or kinked hoses are a false economy. Replace them with the tap.
Why does my new tap wobble?
The under-sink fixing nut is loose, or the sink hole is oversized for the tap’s clamp plate. Re-tighten from below while holding the tap square; add the manufacturer’s spacer kit if supplied.
3 comments