How to Fix a Dripping Overflow Pipe Outside
12 June 2026 Joe HartleyIntermediate30–90 minutes4 comments
Tools
- Adjustable spanner
- Screwdrivers
- Replacement fill valve or washer kit
- Torch
- Towels and a bucket
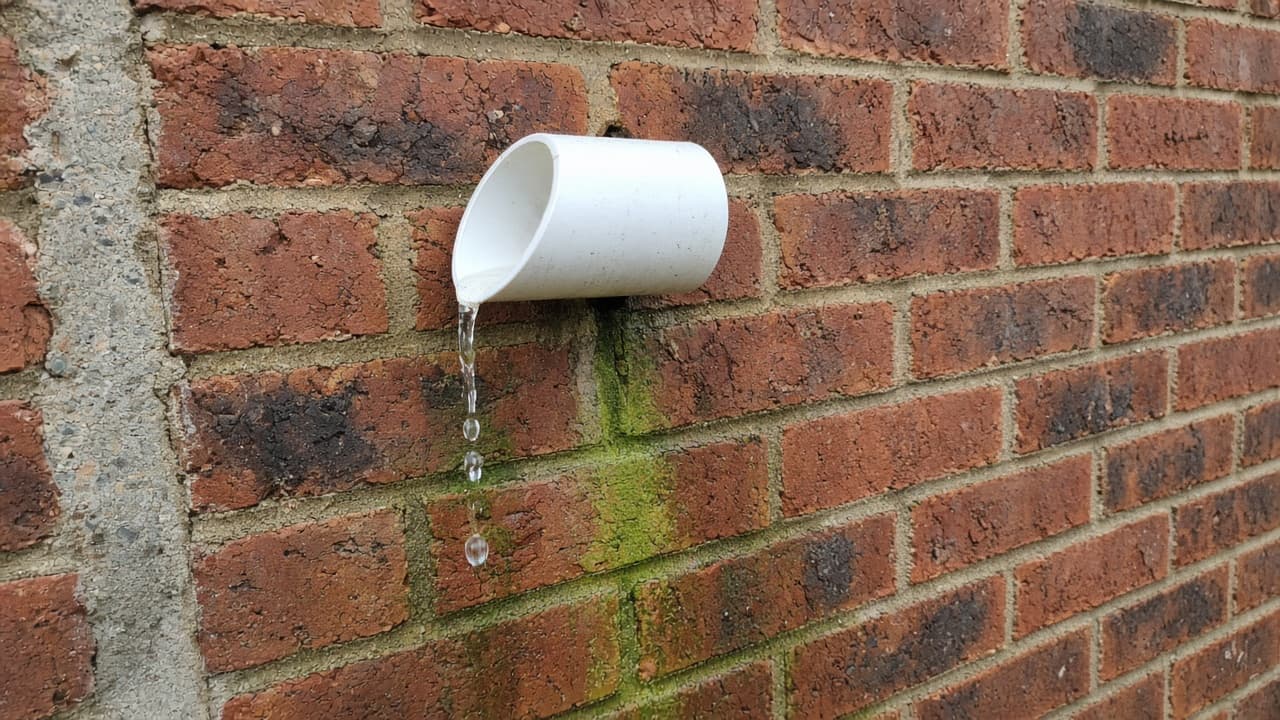
A plastic overflow pipe poking through the brickwork should stay dry. A drip leaves a green stripe and means a cistern or tank is overfilling. Fixing a dripping overflow pipe outside is not a job on the pipe itself. You fix whatever is letting the water level climb to the overflow outlet.
Before you strip anything, confirm which overflow is wet: WC cistern (usually lower on the wall) or loft cold-water storage tank (often higher, sometimes paired with a warning pipe). Full diagnosis is in how to diagnose a constantly dripping overflow.
Which system is overflowing?
| Clue | Likely source |
|---|---|
| Pipe exits near a bathroom and drips after flushing | WC cistern fill valve stuck or set too high |
| Pipe exits higher up, often at loft level; drip is constant | Cold-water storage tank ball valve or float |
| Drip only when someone runs a tap upstairs then stops | Tank refilling; valve not shutting fully at the end |
| Several overflows or a soaked loft ceiling | Do not DIY further until you find the leak path |
Never plug an overflow to “stop the drip”. The overflow is the warning. Blocking it pushes water into the loft or through a cistern lid instead.
Isolate and open the right lid
WC cistern: Close the isolating valve on the fill pipe (often a small service valve on the flexi or copper). Flush to lower the level. Lift the cistern lid carefully; condensation and old sealant make lids sticky.
Loft tank: Take a torch, boards if the loft is joists-only, and close the tank’s float valve by hand or isolate the mains feed to the tank if there is a valve. Do not stand on plasterboard. Note the waterline mark on the tank wall; limescale rings show where it used to sit.
If a toilet is also reluctant to flush while you work, clear the pan first if needed: how to unblock a toilet.
What you will need
| Item | Notes |
|---|---|
| Part-ball or diaphragm fill valve / washer kit | Match what is in the cistern; UK ½″ BSP is common |
| Adjustable spanner | Backnut under cistern or tank wall |
| Screwdrivers | Lid clips, float arm screws |
| PTFE tape | Only on tapered threads that need it |
| Bucket and towels | Expect a spill when you crack the valve |
Step-by-step
1. Confirm the waterline vs overflow
With the fill stopped, the water should sit well below the overflow outlet (often 25 mm or more). If the float is set so the valve only closes at overflow height, lower the float or adjust the valve’s level screw before you replace parts.
2. Free a sticking float
Lift the float through its full travel. If it catches on the cistern wall, a flexible hose, or a tangled chain on an old siphon, free it. A waterlogged foam float that sits low will never shut the valve; replace the float or the whole fill valve.
3. Renew a worn fill valve or washer
Isolate the supply. Undo the supply connection and the backnut. Fit the new valve with the washer and backnut snug against the cistern wall so it cannot spin. Set the float or adjuster so the valve closes below the overflow. Open the supply slowly and watch the level rise and stop.
On older Portsmouth ball valves, a new rubber washer in the valve body often restores the seal. On modern quiet fill valves, buy the matching cartridge or whole unit; mixing brands is a false economy.
4. Check the overflow pipe is clear (optional)
If the cistern was overfilling but the outdoor drip was intermittent, the overflow pipe may have a kink or debris. From outside, you should see a free drip path; do not shove wire blindly into a pipe that exits above a neighbour’s path. Clearing the cause of overfill matters more than polishing the pipe.
5. Retest after a full cycle
Flush a WC twice, or run a bath from a loft-fed system, then wait. The outdoor pipe should stay dry once the tank or cistern has settled. Feel around the new valve for weeps at the backnut.
Mistakes that leave a green stripe
- Plugging the overflow with a cork or tape.
- Setting the waterline so high that a warm day or slight bounce trips the overflow.
- Replacing the outdoor pipe elbow when the fill valve is the fault.
- Working in a loft without boards and putting a foot through the ceiling.
When to call a plumber
Get help if the loft tank is corroded or unsupported, if there is no isolator and the mains will not shut cleanly, or if water has already soaked insulation and ceilings. Shared stacks and landlord systems may restrict what you can change. Hot-water cylinder overflows and boiler pressure-relief discharges are not the same as a cold cistern warning pipe; treat those as heating / Gas Safe territory when they are tied to a boiler.
Same cluster: how to diagnose a constantly dripping overflow if you are still unsure which pipe is wet, how to isolate a water supply at the stopcock UK when you need the loft tank feed dead, how to find your stopcock in a UK home if you cannot locate the valve, and how to unblock a toilet if a jammed pan is complicating the bathroom while you work.
FAQ
How do I fix a dripping overflow pipe outside?
Find which cistern or tank feeds that pipe, lower or renew the fill valve so the waterline sits below the overflow, and never block the pipe. The outdoor stub is a symptom, not the repair.
Why is my overflow pipe dripping?
Usually a stuck or poorly set ballcock / fill valve in a WC cistern or loft cold-water tank. Less often, a failing valve that weeps only at the end of a refill.
Can I just cut the overflow pipe shorter?
No. Length does not cure overfill, and you still need the outlet clear and visible. Fix the water level.
Is a dripping overflow an emergency?
A light drip is a warning; a steady stream can empty a loft tank and damage ceilings. Isolate the feed if water is pouring and call a plumber if you cannot stop the fill.
4 comments