How to Build a Garden Shed Base
20 June 2026 Joe HartleyIntermediate1–2 days18 comments
Tools
- Tape measure and pegs
- Spirit level and straight edge
- Spade and rake
- Rubber mallet
- Saw (for timber bearers)
- Wheelbarrow
A garden shed base fails long before the walls if it sits on soft earth or a diamond-shaped footprint. Get the ground firm, drained, and square first. The shed panels then land on something that does not twist when the first wet winter hits.
This is the first job in the build series. Overview of the whole project: how to build a garden shed. Once the base is true, move on to how to assemble a shed.
Which base suits your plot
| Base type | Best for | Watch-outs |
|---|---|---|
| Timber bearers on hardcore | Flatish lawn or soil; lighter timber sheds | Bearers must be pressure-treated and kept clear of standing water |
| Concrete paving slabs on sand/hardcore | Most DIY-store panel kits; good airflow under floor | Slabs must be level as a plane, not only corner to corner |
| Plastic grid / shed base kits | Faster installs; uneven ground if you pack properly | Follow the maker’s fill (often gravel). Cheap grids flex if underfilled |
| Full concrete slab | Heavy workshops, brick bases, permanent siting | Overkill for a light timber kit; curing time and fall for rain matter |
Most UK garden sheds want a base slightly larger than the floor footprint (often 50–100 mm each side) so cladding drips clear of the edge. Check the shed maker’s drawing before you dig. On a slope steeper than a spirit level will forgive with thin packing, dig and terrace rather than stacking wedges under one corner forever.
Permitted development for garden buildings has size and position limits. If you are hard against a boundary, over 2.5 m high near a fence, or treating the shed as living space, read build a garden shed before you commit to a permanent slab.
Tools and materials
| Item | Notes |
|---|---|
| MOT Type 1 or similar hardcore | Compacted sub-base under slabs or grids |
| Sharp sand | Bedding for slabs |
| Pressure-treated bearers | Often 75 × 47 mm or 100 × 47 mm; spaced to match the shed floor joists |
| Concrete paving slabs | Common 600 × 600 mm or 450 × 450 mm; match the shed footprint |
| Plastic base kit | Size matched to the shed model where possible |
| Weed membrane | Under grids or slab beds if the maker allows it |
| Pegs, string line, tape | For squaring with the 3-4-5 method |
Step-by-step
1. Mark out and clear
Measure the shed floor (or the kit’s stated base size). Peg the rectangle and check both diagonals match within a few millimetres. Strip turf and soft topsoil to firm ground. Dig out roots and soft spots; backfill soft hollows with hardcore, not lawn cuttings.
2. Build a compacted sub-base
Spread hardcore in layers about 50–75 mm thick. Compact each layer with a hand tamper or plate compactor hired for half a day if the area is large. Aim for a finished sub-base that is roughly level and about 50–100 mm below the finished base height you want (so rain does not pool against the shed floor). Leave a slight fall away from fences and house walls if water has nowhere else to go.
3. Fit your chosen top surface
Timber bearers: Lay membrane if using it, then set bearers parallel to the shed floor joists (or as the maker shows). Pack with offcuts of treated timber or slate until a long spirit level reads true along and across. Bearers that rock will print every bounce into the floorboards.
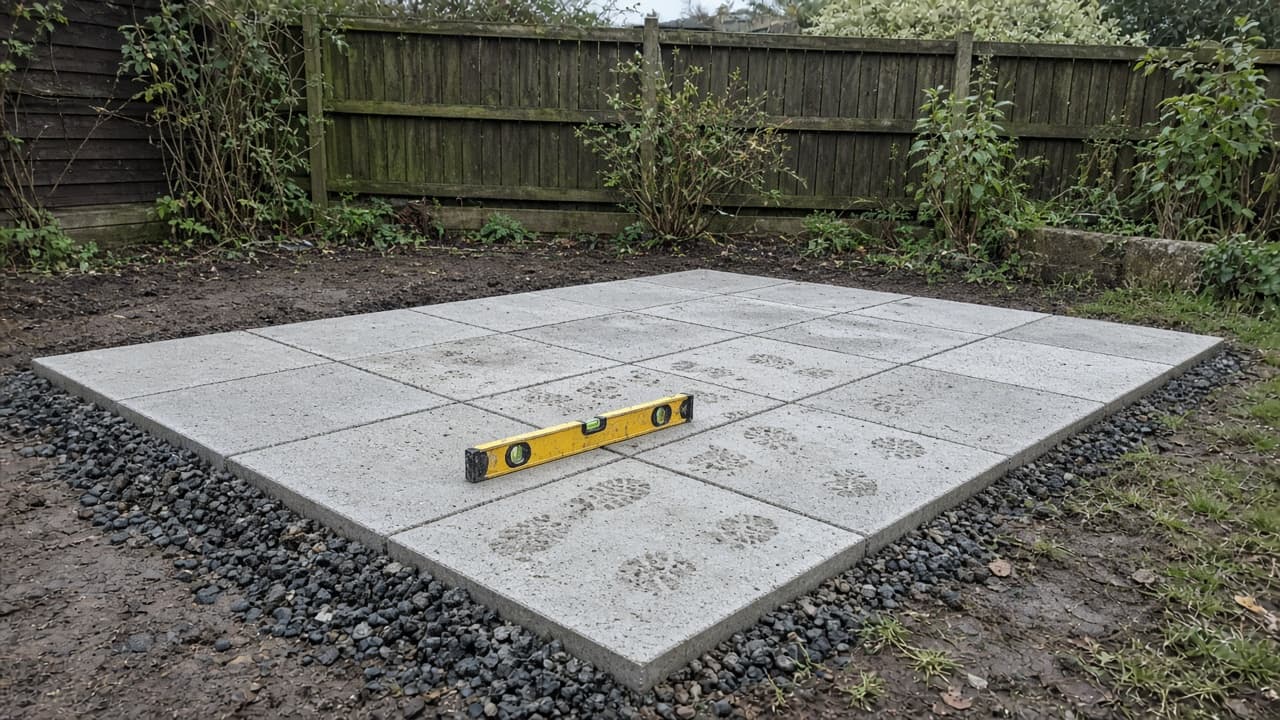
Slabs: Bed slabs on a level sand layer over hardcore. Tap down with a rubber mallet. Check with a straight edge across several slabs; a single slab can look flat while the row waves. Leave tiny joints; do not rely on loose slabs that tip under a foot.
Plastic grid: Assemble the grid on the prepared bed, fill cells with angular gravel as instructed, and brush level. Underfilled cells feel springy and the shed will rack when you screw the walls.
4. Final check before the shed arrives
Walk the base. Nothing should rock. Recheck diagonals. Dry-fit the shed floor panels or bearers if they are separate; they should sit without forcing. If one corner is high, dig out or re-bed that area rather than planing the floor later.
Mistakes that sink a shed in year one
- Building to the old shed’s outline without measuring the new floor. Kits are often a few centimetres different.
- Sitting timber bearers straight on soil. They rot; the floor goes soft at the edges first.
- “Near enough” diagonals. A base that is 15 mm out of square fights every wall panel.
- Packing one corner with stacked bricks that crush into the ground after the first storm.
When to call a landscaper or builder
Stop and get help if you hit a soakaway, shared drain, or cable you cannot identify (hire a cable locator if you are digging near services). Call a builder for a proper reinforced slab under a heavy workshop, or if the ground is soft clay that pumps water after rain and will not hold a DIY hardcore bed.
Next in the series: assemble the shed, then felt a shed roof. Later finishing: secure a shed against theft and treat and paint a shed. Project hub: how to build a garden shed.
FAQ
Do I need a concrete base for a garden shed UK?
No. Many timber panel sheds sit happily on slabs, treated bearers, or a filled plastic grid if the ground is compacted and level. Use a full concrete slab when the shed is heavy, brick-based, or you want a permanent workshop floor.
How big should a shed base be?
Match the maker’s drawing. As a rule, make the base at least as large as the floor, often a little larger so water drips clear of the timber. Measure the floor panels, not the old shed’s cladding outline.
How do I stop a shed base flooding?
Raise the finished base above the surrounding soil, keep soil and bark mulch off the cladding, and give rain a path away from the floor. Do not sink the base in a hollow “to hide it from the lawn”.
18 comments