How to Hang Plasterboard on a Solid Wall
11 June 2026 Joe HartleyIntermediate1–2 days per room wall11 comments
Tools
- Spirit level and chalk line
- Tape measure and pencil
- Mixing paddle and bucket (for adhesive)
- Notched trowel or hawk for dabs
- Hammer drill and masonry bits (battens)
- Cordless drill/driver
- Plasterboard saw or knife
- Board lifter or timber packers
- Straight edge / long level
Hanging plasterboard on a solid wall means covering brick, block, or old plaster with a dry lining you can joint and paint. In UK homes the two common routes are adhesive dabs (dot and dab) or timber battens screwed to masonry. Both work. Pick for flatness, services, and how much room you can lose.
If the wall is already a timber or metal stud frame, this guide does not apply. Board onto the studs as a separate framing job; use patch a hole in plasterboard only for local repairs once the lining is up.
Dot and dab or battens?
| Approach | Best when | Watch-outs |
|---|---|---|
| Dot and dab | Wall is reasonably flat; you want speed; no big services to chase | Uneven brick needs thicker dabs; hard to run new cables later without chasing |
| Timber battens | Wall is wavy; you need a service zone; you want mechanical fixings you can see | More work; battens must be packed true; room loses depth of batten + board |
| Insulated laminated board | Cold external wall and you accept the thickness | Different detailing; see insulation guidance before you commit |
Standard 12.5 mm plasterboard is the usual lining. Moisture-resistant board near baths and kitchens if the maker allows it for that room. Ceiling height sheets (often 2400 mm or 2700 mm) cut joins if your walls are tall enough.
Room loss: Dot and dab typically eats about 10–20 mm plus board thickness once dabs crush. Battens (often 25 × 50 mm or 38 × 50 mm) plus 12.5 mm board lose more. Measure skirtings, sockets, and radiator brackets before you buy.
What you will need
| Item | Notes |
|---|---|
| Plasterboard sheets | Face the ivory (or printed) side out for jointing |
| Gypsum board adhesive | For dabs; mix to maker’s bag, not soup |
| Treated softwood battens | If battening; straight stock only |
| Masonry plugs and screws | For battens into brick or block |
| Plasterboard screws | Into battens, not into bare adhesive alone for primary hold |
| Packers / shims | To true battens or prop boards |
| Joint tape and compound | Separate finish job after boards are set |
Prep the masonry
- Strip loose wallpaper, soft plaster, and dusty paint where adhesive or battens will sit.
- Brush or vacuum dust. Adhesive hates a chalky face.
- Mark sockets, switches, and any pipes. Decide cut-outs before the board goes up.
- Snap a vertical plumb line for the first sheet edge. Corners lie if the first board leans.
- Check floor and ceiling for bow. You may need to undercut board or leave a small gap for skirting later.
Do not cover active damp or rising damp stains and hope paint hides them. Dry and diagnose first (stop condensation stains returning on cold walls when you are painting after lining).
Method A: Dot and dab
1. Mix adhesive
Mix board adhesive to a stiff paste that holds a dab on the wall without slumping. Follow bag water ratios. Fresh mix only; do not reconstitute a skinning bucket.
2. Butter the wall, not the board only
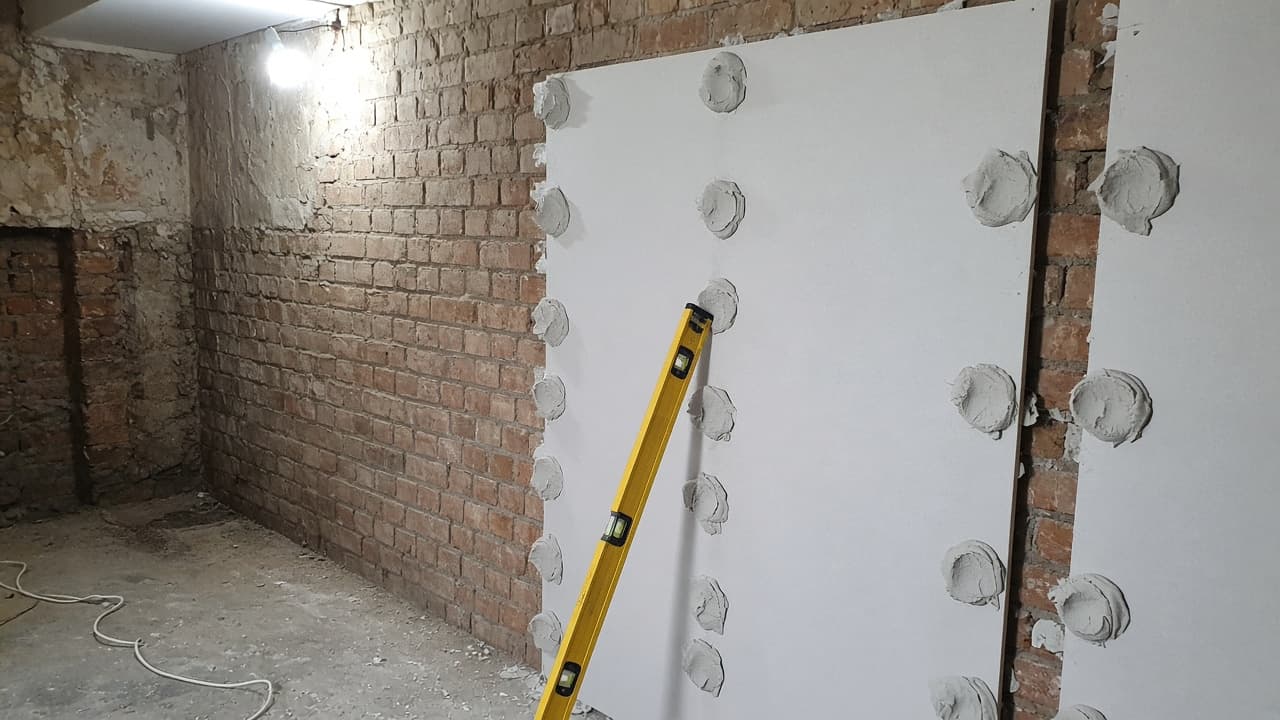
Apply dabs to the masonry in a grid: roughly fist-sized blobs at about 300 mm centres across the sheet area, with a continuous dab or ribbon near edges and openings. Some people dab the board back as well on very uneven brick. Keep dabs proud enough to crush flat to your finished plane.
3. Offer the board and beat it true
Lift the sheet onto thin packers at floor level (about 10 mm) so it does not wick from a damp floor. Press onto the dabs. Use a straight edge and a rubber mallet or board beater to tap the face until the sheet is plumb and flush with neighbouring boards. Wipe squeeze-out before it sets.
4. Temporary props
Prop or screw temporary timber across the face into dabs or into temporary plugs if the board wants to spring. Leave props until the adhesive has set (often overnight; check the bag). Do not joint while boards can still rock.
5. Cut-outs and next sheets
Mark electrical boxes from the face once the board is set, or cut openings before offering if you can transfer positions accurately. Stagger joints on multi-board walls. Leave a hairline gap at joints for tape compound, not a 10 mm trench.
Method B: Battens then board
1. Fix vertical battens
Mark batten centres to suit board width (often 400 mm or 600 mm centres so sheet edges land on timber). Drill masonry, fit plugs, and screw battens plumb. Pack behind low spots with shims so the face of every batten is in one plane. A wavy batten line prints through as a wavy wall.
2. Cross noggins where needed
Add horizontal pieces behind future shelf lines, TV brackets, or heavy fixtures. Dry lining on battens without backing timber is weak for point loads.
3. Screw the plasterboard
Offer sheets onto the packers at floor level. Screw into battens with plasterboard screws at about 300 mm centres on intermediates and closer on edges. Screw heads should dimple the paper without tearing it. Do not bridge hollows by over-driving one edge until the sheet bows.
4. Check the plane
Run a long level across joints. High screws and proud edges show after skim or tape. Adjust before you move on.
After the boards are up
Tape and joint (or skim) is a separate finish: skim a wall patch. New board needs a mist coat or board primer before emulsion; do not skip that and hope filler alone hides flashing.
Common mistakes
- Starting without a plumb first edge, then chasing the lean across the room.
- Dabs mixed too wet so boards slide overnight and open joints.
- Screwing only into adhesive with no mechanical backup where the maker expects battens or secondary fixings.
- Ignoring socket depths so boxes end up recessed or proud of the finished face.
- Covering damp brick and trapping moisture behind a sealed lining.
When to call a plasterer or builder
Call a pro if the wall is structurally cracked, soaked, or out of plane by more than you can pack honestly. Call if you need fire-rated or acoustic systems with specified fixings. Large full-house dry lining with services redesign is usually cheaper as a trade package than a DIY redo after boards fail.
Related: patch a hole in plasterboard, skim a wall patch, repair blown plaster, repair a large hole in a plaster wall.
FAQ
How thick should plasterboard be on a solid wall?
12.5 mm is the standard UK lining thickness for walls. Thinner 9.5 mm is more for ceilings in some older specs. Insulated laminated boards are thicker still; check door reveals and sockets before you buy.
Can I dot and dab over painted brick?
Only if the paint is sound and the adhesive maker allows it. Glossy or flaking paint fails. Abrade or strip doubtful finishes so dabs grip masonry or a sound key, not a paint film.
Do I need vapour control behind dry lining?
On cold external walls, condensation risk rises if you seal a cold face without thinking about insulation and ventilation. For insulated internal lining decisions, read stop condensation stains returning on cold walls before you lock moisture into the build-up.
How long before I can tape the joints?
Wait until adhesive is set and boards are firm under hand pressure, typically the next day for gypsum board adhesive in normal UK room temperatures. Cold garages take longer. Rocking boards crack fresh joints.
11 comments