How to Tile Over Existing Tiles When OK
18 August 2026 Joe HartleyIntermediate1 day prep and tiling for a small wall4 comments
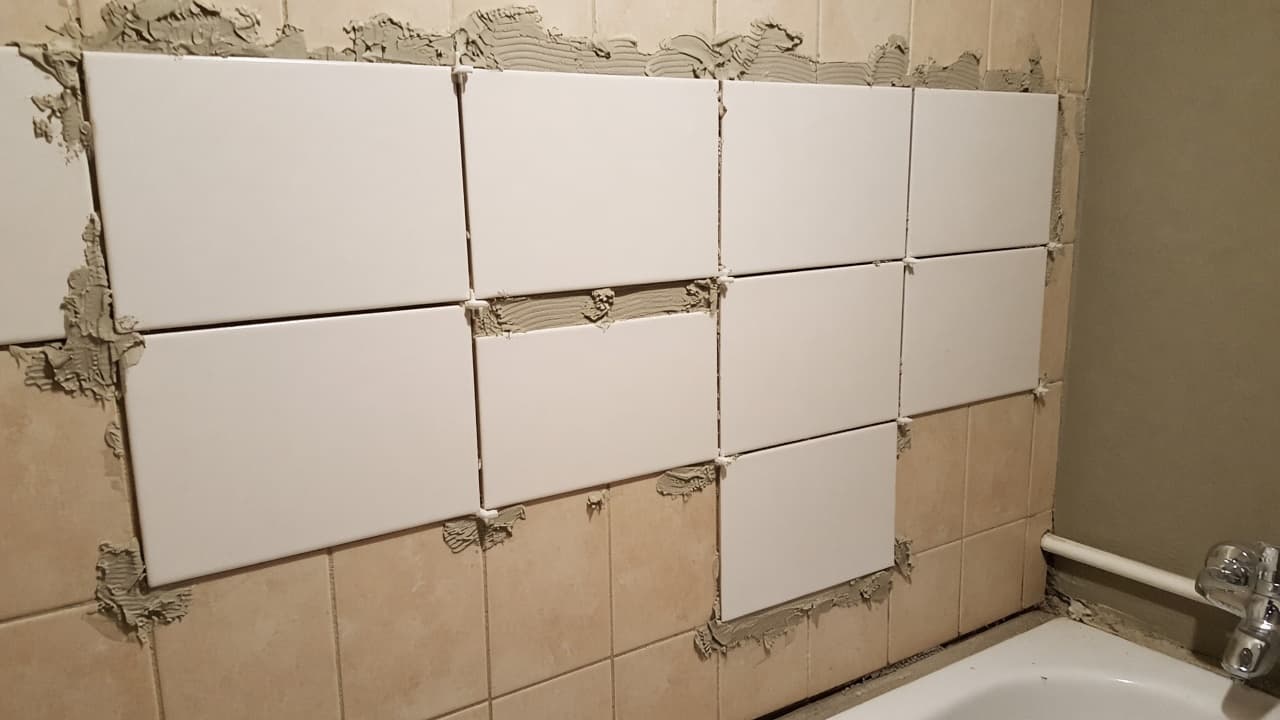
Tools
- Rubber mallet and listening tap test
- Sugar soap and abrasive pad
- Primer for non-porous surfaces (if specified)
- Notched trowel
- Flexible tile adhesive rated for over-tiling
- Tile spacers
- Angle grinder with diamond blade (for keying, optional)
- Spirit level
Tiling over existing tiles can save mess and plaster repairs, but it also doubles weight and hides soft spots. Most of the work is the go / no-go decision. The adhesive job is straightforward once the old face passes.
If the wall fails the checks below, strip instead with how to remove old tiles without wrecking the wall.
When over-tiling is OK
| Condition | OK to over-tile? |
|---|---|
| Old tiles firm, no hollow ring when tapped | Yes, if flat enough |
| A few cracked tiles but bed still solid around them | Replace those tiles or fill, then reconsider |
| Whole areas sound hollow or move under hand pressure | No. Strip |
| Greasy kitchen glaze, cleaned and keyed or primed | Often yes |
| Shower or wet room with unknown or failed tanking | No. Strip, tank, retile (shower enclosure guide) |
| Soft plasterboard sagging under old tiles | No |
| Floor build-up that will trap doors or break falls to a drain | Usually no without a full redesign |
| You need to chase pipes or move boxes behind | Strip so you can access the wall |
Weight and thickness: A second layer of ceramic on a sound masonry wall is common. On plasterboard, check the board is MR where needed, well fixed, and that trim, sanitaryware, and doors still work with the extra thickness (often 8–12 mm tile plus adhesive).
Flatness: Lippage and belly in the old face print through. If a straight edge rocks over more than your new adhesive can take up, strip or skim with a suitable levelling compound made for tiling, not filler meant for paint.
When you should not
- Active damp, salts, or mould behind the old tiles.
- Movement cracks that reopen.
- Unknown leaks in a shower. Over-tiling seals you out of the repair.
- Loose trim, crumbling grout with soft bed beneath, or tiles that click when pressed.
- A patchwork of different thicknesses you cannot plane into one face.
In those cases, removal and a proper background are cheaper than doing the job twice.
Prep that makes the second layer stick
- Tap every tile. Mark hollows. Cut out and repair failed tiles, or abandon over-tiling if failures are widespread.
- Degrease with sugar soap. Kitchen splashbacks hide a film that kills adhesion.
- Key glossy glaze: abrade with a coarse abrasive pad, or lightly scarify with a diamond cup on an angle grinder (PPE, dust control). Vacuum dust.
- Prime if the adhesive maker requires a primer for non-porous tiles. Do not invent a PVA wipe unless the bag says so; PVA can form a weak skin.
- Check plumb and level. Plan new joints. Old grout lines showing through thin new tiles look messy; a slight offset or a tile with more body helps.
Step-by-step over-tile
1. Choose adhesive for over-tiling
Use a flexible cementitious adhesive that explicitly allows application over existing tiles. Thin ready-mix alone on a sealed glaze is a common failure.
2. Comb a solid bed
Spread adhesive on the old face so ridges are even. Butter large new tiles. You need collapse to a continuous bed, not dots.
3. Set the new tiles
Start from a level datum as in bathroom wall tiling or a splashback. Spacers in. Wipe joints. External corners need deeper trim to cover two tile thicknesses if the old edge stays.
4. Detail junctions
Silicone at baths, worktops, and change of plane. Remember doors, toilet cisterns, and window boards may need packing or trimming because the wall grew.
5. Grout and cure
Grout after adhesive set. Do not soak the wall with water while curing. Extra thickness slows drying slightly in cold rooms.
Mistakes that peel in six months
- Skipping the tap test and bonding over a drumming field.
- Over-tiling a leaking shower “to freshen it”.
- Using ordinary PVA as a primer on glaze.
- Leaving kitchen grease on the old face.
- Ignoring door clearances and electrical faceplate depth after the wall thickens.
When to call a pro
Call a tiler if large-format tiles must go over an imperfect old face, or if the shower waterproofing history is unknown. Call a builder if plasterboard feels soft or fixings pull through. Structural or recurring damp needs diagnosis before any second skin.
Related: remove old tiles without wrecking the wall if the face fails, tile a bathroom wall, tile a splashback, tile a shower enclosure.
FAQ
Will tiling over tiles make the room noticeably smaller?
On walls, usually only by the new tile plus adhesive (often around 10 mm). That matters at door linings, window boards, and where a bath rim meets the wall. Measure clearances before you buy thick porcelain.
Do I need to remove the old grout?
Not always. Firm grout can stay if the face is keyed and clean. Rake out crumbling grout and loose edges so they do not telegraph soft spots under the new bed.
Can I over-tile a bathroom floor?
Only if the structure can take the load, the floor is flat and dry, and falls to wastes still work. Many UK timber bathroom floors are a poor candidate. When unsure, strip or get a fitter’s opinion.
Is primer always required?
Follow the adhesive data sheet for non-porous substrates. Some systems want a stated primer; others want a mechanical key only. Guessing with household PVA is a frequent cause of sheet failure.
4 comments