How to Tile a Shower Enclosure
4 August 2026 Joe HartleyIntermediate2–4 days including tanking and curing4 comments
Tools
- Waterproof tanking kit (liquid or sheet system)
- Spirit level and tape measure
- Notched trowel
- Tile spacers
- Tile cutter or wet saw
- Flexible tile adhesive and waterproof grout
- Grout float and sponge
- Sanitary silicone
Shower tiling fails from water behind the tiles, not from crooked grout lines. Waterproof the board first, bed tiles into a continuous adhesive layer, then seal every change of plane.
If you cannot complete tanking to the system instructions, stop. Do not “tile anyway and silicone harder”. Water will find the gap.
Tank first or walk away
| Check | Pass | Fail (stop) |
|---|---|---|
| Background | Moisture-resistant board or solid wall prepared for the tanking system | Soft plasterboard, loose old tiles, active leaks |
| Tray or former | Level, sealed to walls per maker, waste tested dry | Rocking tray, unsealed upstand, leaks on a bucket test |
| Tanking | Full wet-zone coverage, reinforced corners, dried per data sheet | Patchy paint-on coat, missed screw heads, no corner tape |
| Adhesive | Rated for wet areas over the tanking product | Random wall adhesive with no wet-area claim |
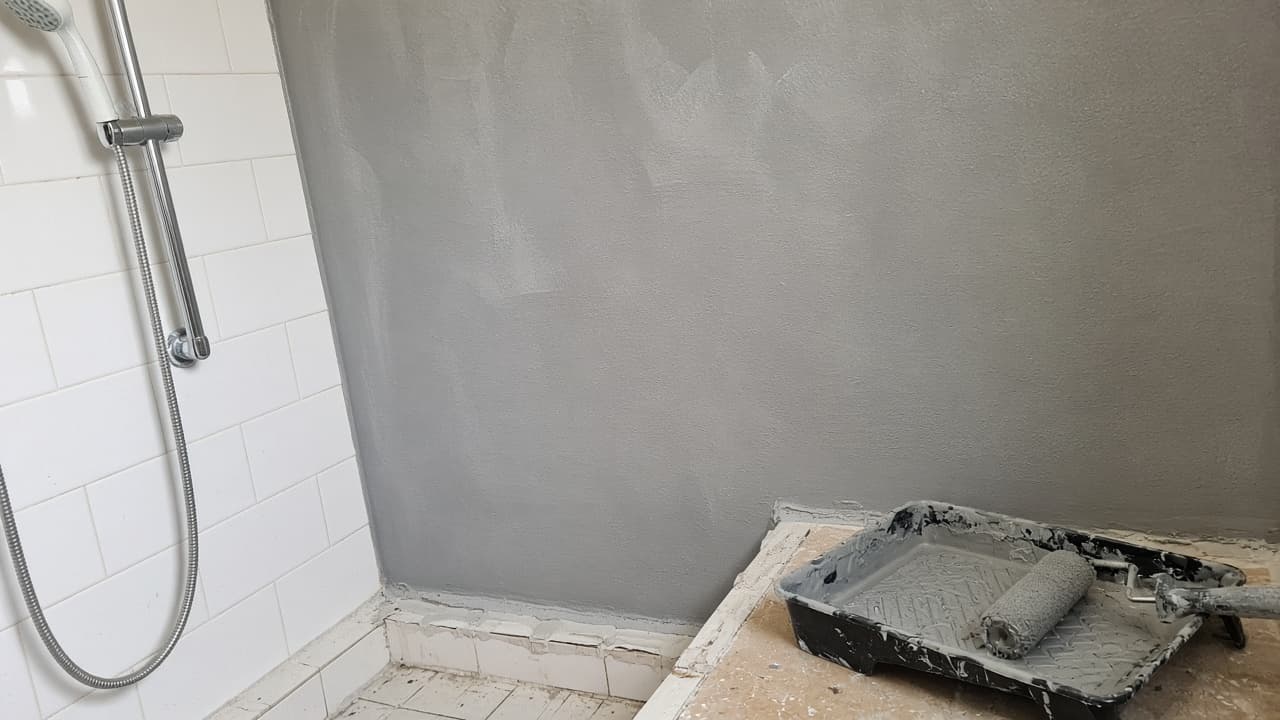
Liquid tanking (brush or roller systems with reinforcing tape at corners and tray junctions) and sheet membranes both work if you follow one system end to end. Do not mix brands mid-wall unless the makers say they are compatible.
Height: Tank at least the full spray zone, typically to above shower-head height and across the width of the enclosure. Local practice and the kit instructions win over guesswork.
For general bathroom walls outside the cubicle, see how to tile a bathroom wall. Do not treat this job like a splashback.
What you will need
| Item | Notes |
|---|---|
| Tanking kit | Primer, coats, corner tape / reinforcing fabric as supplied |
| Flexible cementitious adhesive | Compatible with your tanking; check the sheet |
| Wall tiles | Porcelain is common in showers; confirm frost/wet rating is irrelevant indoors but density helps |
| Spacers | Consistent joints; epoxy or highly water-resistant grout where specified |
| Wet saw | Clean cuts at valves and niches |
| Sanitary silicone | Tray perimeter, enclosure frame abutments, internal corners after grout |
Waterproofing sequence (do not skip)
- Fix and seal the shower tray or former. Flood-test the waste if you can before closing the wall finishes.
- Prepare the wall: clean, dry, screw heads flushed, joints treated as the tanking maker requires.
- Apply primer if specified. Tape internal corners, tray abutments, and pipe penetrations with the system tape.
- Apply tanking coats to the stated thickness and overlap. Let each coat dry fully. Pinholes and missed bands around the mixer valve are classic leak paths.
- Only then mix adhesive. Tile onto cured tanking, not onto damp coating.
If old tiles must come off before tanking, use how to remove old tiles without wrecking the wall. Tiling over existing tiles is rarely wise inside a shower unless the whole wet system is designed for it.
Step-by-step tiling
1. Set out from a level datum
Mark a level line for the first full course above the tray upstand. Dry-check cuts at the valve and any niche. Avoid a joint landing on the centre of a pipe hole if you can shift the layout slightly.
2. Comb a full bed
Spread adhesive so ridges collapse to a solid bed. Butter the back of large tiles. In a shower, hollow spots become water pockets if the face seal ever fails.
3. Bed tiles from the datum up
Seat with spacers. Keep faces flat with a straight edge. Work around the mixer: cut the tile to fit, leave clearance for the trim or cover plate, and keep tanking intact at the penetration.
4. Niches and shelves
Tank the niche box before tiling it. Slope niche floors slightly to the shower so water does not pool. Mosaic floors in niches hide falls better than one large tile that sits dead flat and holds water.
5. Cure, grout, silicone
Respect adhesive cure time in a cold bathroom. Grout fully compacted joints. When grout has set, silicone the tray-to-tile junction, enclosure frame contacts, and internal corners that the tanking maker wants sealed on the face. Tool the bead; gaps under silicone are leaks waiting.
6. Final water test
After full cure, run the shower and watch junctions. Early dark patches in adjacent plaster or pooling behind the tray mean open up and fix, not another tube of sealant on top.
Mistakes that flood neighbours
- Tiling straight onto ordinary plasterboard with no tanking.
- Leaving screw heads and board joints untaped under liquid tanking.
- Starved adhesive behind the tile face so water travels sideways if grout fails.
- Grouting the tray seal instead of using sanitary silicone.
- Fitting the glass enclosure onto unfinished silicone and tearing the bead.
When to call a pro
Stop and hire a tiler or bathroom fitter if tanking feels unclear, the tray is wrong for the opening, or you have had leaks into a ceiling below. Call a plumber for waste and supply alterations. Timber floors with repeated wetting need structural advice before you hide damage under a new tray.
Related: tile a bathroom wall for dry elevations, tile a splashback for a simpler practice run, remove old tiles without wrecking the wall if the old face must come off, tile over existing tiles when OK only where the wet-zone checks pass.
FAQ
Can I tile a shower without tanking if I use waterproof grout?
No. Grout and silicone are the face seals. Tanking (or a proprietary waterproof board system) is the backup when those fail. Relying on grout alone is how ceilings below get stained.
How long after tanking can I tile?
Follow the kit. Many liquid systems want the final coat touch-dry or fully cured within a stated window. Tiling onto a wet coat can wrinkle membranes and trap moisture.
Should shower joints be epoxy grout?
Cementitious anti-mould grout is common and fine when tanking and silicone are correct. Epoxy is tougher against staining and water but harder to work. Use it if you can finish joints cleanly; a poor epoxy wipe is worse than a good cementitious job.
Why does mould return on new shower silicone?
Often trapped moisture behind a failed bead, poor ventilation, or silicone on a dirty joint. Cut out failed sealant, dry the joint, and reseal. Chronic mould with soft board behind tiles means the waterproofing has failed and needs opening up.
4 comments