How to Level Kitchen Base Units
17 June 2026 Joe HartleyIntermediate2–4 hours7 comments
Tools
- Long spirit level or laser level
- Straight edge
- Adjustable unit legs (as fitted)
- Packers or hardboard shims
- Tape measure
A worktop shows every hump in the base run. If one carcass sits 3 mm high, laminate joints open, doors bind, and saucepans rock. Levelling is its own job: the carcasses can be in the right place and still wrong until the tops form one plane. Fit the units roughly first (how to fit kitchen base units), then settle the legs properly before you cut or fix a worktop.
Why a “level” floor still needs packing
UK kitchen floors often fall toward a doorway or rise at an old hearth. A spirit level on the vinyl can look fine over 600 mm and still be 8 mm out over a 3 m run. Unit legs exist to absorb that. Your target is not “each unit level on its own”. It is one continuous top line along the whole run, front and back.
| Check | Passes when |
|---|---|
| Along the run | A long level or laser sits true across several carcass tops |
| Front to back | Each top is level from wall to front rail (worktop will not tip) |
| Diagonals on one unit | Carcass is not twisted; doors will not bind |
| Adjacent faces | Front edges flush; connecting bolts are not pulling a step |
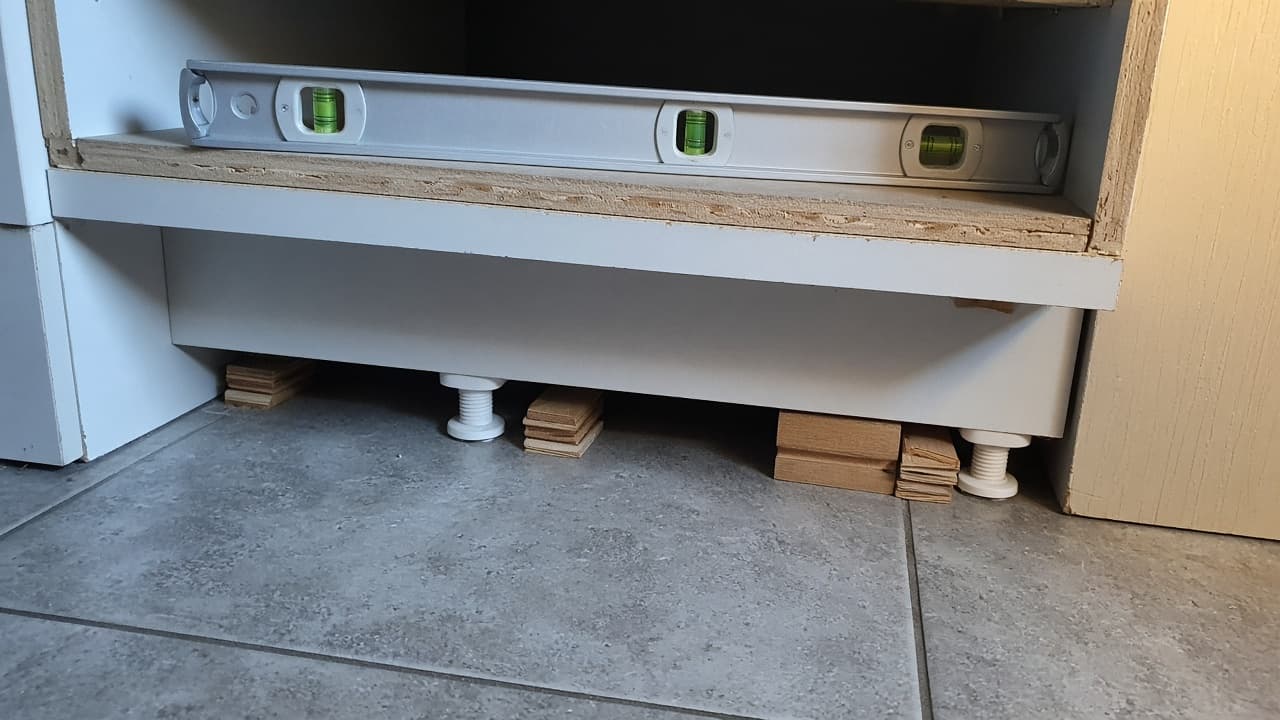
If legs run out of adjustment before the top is true, pack under the foot with a solid shim (hardboard, plastic packer), not a stack of cardboard that compresses after a week.
Tools that actually help
| Item | Notes |
|---|---|
| Level at least 1200 mm long | Short levels miss waves between units |
| Laser level (optional) | Speeds a long galley; still verify with a spirit level on the tops |
| Straight edge / spare worktop offcut | Spans three carcasses to show steps |
| Packers | Thin, stable; keep a mixed pack |
Do this with doors and drawers out. Weight changes the feel of a near-level carcass once you load it.
Working along the run
1. Find the high point
Set a long level or laser across the assembled run. The high spot on the floor (or the highest leg already wound up) is your reference. You usually lower other areas to meet it, or raise everything to clear a hollow, depending on how much leg travel you have and whether plinth height still looks right.
2. Level the first carcass fully
Adjust all four (or six) legs until the top is level front to back and side to side. Press on each corner. Nothing should rock. Twisted carcasses often need one back leg eased while the opposite front comes up a touch.
3. Match neighbours to that plane
Bring the next unit’s top to the same height at the joint. Use the long level across both tops, not only inside each unit. Clamp the faces flush, then tweak legs until the straight edge shows no step. Only then snug the connecting bolts. Tightening bolts across a step pulls the chipboard and never quite closes later.
4. Repeat, then lock the backs
Work along the run the same way, including across appliance gaps: bridge the gap with the straight edge so both sides of a dishwasher opening stay coplanar. When a section is true, fit or tighten the wall brackets so adjusting a leg later does not pull the carcass off the wall line.
5. Final pass before worktops
Refit a couple of doors as a check. Even gaps top and bottom mean the carcasses are happy. Recheck after someone has walked the floorboards nearby; suspended timber floors can settle a fraction once loaded. Then fit wall units to a height taken from this plane, and fit the worktop.
Common mistakes
- Levelling only the front rail. The back sits low, the worktop tips toward the wall, and water runs under upstands.
- Winding one leg to “stop a rock” without rechecking the long plane. You cure a local wobble and create a hill.
- Packing with soft timber offcuts that crush. The run goes out again after the worktop and appliances go in.
- Connecting bolts done before the tops match. The joint looks tight on the face and still shows a ridge under laminate.
When to call a fitter
Call a fitter or builder if legs are at maximum and the run still falls, or if the floor springs underfoot. Sistering joists, a suitable levelling compound, or a proper sub-base beats a mountain of packers. Do not rely on a thick worktop to hide a twisted run; joining laminate worktops will not close a step that starts in the carcasses.
Gas Safe still applies if levelling means shifting a gas cooker or hob on its hose. Disconnect and reconnect is not a DIY stretch job.
Related: fit kitchen base units, fit kitchen wall units, fit a kitchen worktop, join laminate worktops, cut a worktop for a sink.
FAQ
How level do kitchen units need to be?
Tight enough that a long spirit level shows no meaningful gap under its edge across joints, and doors hang with even reveals. A couple of millimetres of fall over a long run can still look wrong at a laminate joint.
Should I level before or after screwing units together?
Rough-position and roughly level first, fine-level each joint, then tighten connecting bolts. Bolting first freezes errors into the chipboard.
Can I level units after the worktop is on?
Only in small amounts, and it is awkward. You risk stressing joints and brackets. Get the plane right before you cut or fix the worktop, especially before cutting for a sink.
7 comments