How to Fit a Kitchen Worktop
5 August 2026 Joe HartleyIntermediate4–8 hours8 comments
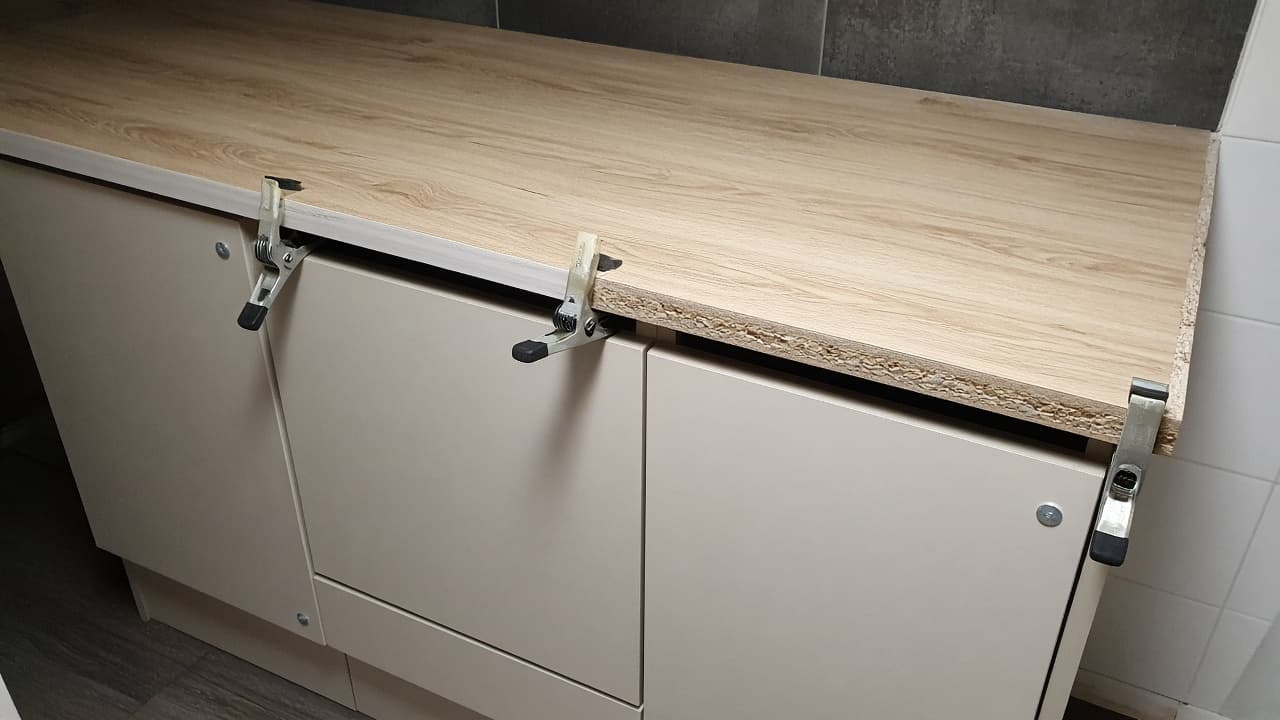
Tools
- Tape measure
- Spirit level and straight edge
- Circular saw or jigsaw with fine blade
- Worktop clamps or G-clamps
- Drill and screwdriver
- Masking tape
- Silicone or worktop sealant
A kitchen worktop only looks expensive if it sits flat, meets the wall cleanly, and does not rock when you lean on it. That starts with level base units, not with the saw. This guide covers fitting a typical DIY-store laminate (or similar) top onto a finished carcass run. Stone and some solid timber tops are a different workflow; leave templated stone to the fabricator.
Laminate, timber, or leave it to a stone yard
| Material | DIY fit? | Notes |
|---|---|---|
| Post-formed laminate | Yes, with care | Common UK choice; seal every cut edge against moisture |
| Butcher’s block / timber | Often yes | Allow for movement; finish cut ends; mind heat and water |
| Laminate with mason’s mitre joints | Yes | See how to join laminate worktops |
| Quartz / granite / sintered stone | No (template and fit) | Fabricator measures after units are fixed |
Do not cut hob or sink openings until the top is sized and dry-fitted. Sink cut-outs: how to cut a worktop for a sink. Gas hobs need a Gas Safe engineer for the gas connection even if you form the aperture yourself (electric hobs still need safe isolation and the right circuit).
Measure and mark without painting yourself into a corner
Front overhang is often about 20–40 mm past the carcass doors, depending on the range and handle clearance. Check door and drawer fronts before you commit. At the wall, plan to scribe rather than trust a factory edge against wavy plaster.
Dry-fit the full length where you can. Support joints over a carcass rail or add a chipboard joiner batten underneath. A joint hanging in mid-air will open.
| Stage | Do this |
|---|---|
| Length | Measure twice; mark the underside so chip-out stays hidden if you cut from below |
| Width / scribe | Push the top to the front overhang line, then scribe the back to the wall |
| Joints | Prefer joints on a cupboard, not over a dishwasher void |
| Ends | Allow for end panels or capped ends per the kit |
If a new monobloc tap is going in with the sink, the hole size is often 35 mm; confirm the tap sheet before you drill.
Step-by-step
1. Confirm the base plane
Run a straight edge along the carcass tops. Fix any rock or step before you cut (level kitchen base units). Offer the worktop up and check the front edge against a string line along the run.
2. Cut to length
Mask the cut line on the decorative face. Cut with a fine-toothed blade; for a circular saw, cutting face-down often reduces chip-out on laminate (check your saw’s advice). Support the offcut so it does not snap the last few millimetres. Seal raw chipboard edges with sealant or edging strip as the maker recommends.
3. Scribe to the wall
Set the top to the finished front overhang. Use a compass or scribing block to copy the wall profile onto the back edge. Cut to the scribe line, then ease the fit until the front sits straight and the back gap is small enough for sealant or an upstand.
4. Join lengths if needed
For L-shapes or long runs, form and bolt the joints before final fixing. Full method: join laminate worktops. Dry-fit the joined top on the units and check the front edge again.
5. Fix from below and seal
Screw up through the carcass corner brackets or bearers into the underside of the worktop. Use screws that will not break through the decorative face; check thickness. Do not over-drive. Run a neat sealant bead where the top meets the wall (or fit the upstand), and seal around sink and hob cut-outs once those jobs are done.
Leave wall units until the top height is final if you still need to tweak (fit kitchen wall units). Many people hang wall units to a line taken from the levelled bases, then fit the top; either order works if the reference plane is true.
Mistakes that stain or rock
- Cutting the sink hole before the top is scribed. The bowl ends up tight to a wavy wall and short at the front.
- Fixing screws that are too long. They dimple or pierce the laminate.
- Leaving chipboard cut edges unsealed at the sink. Swelling starts within months in a wet UK kitchen.
- Jointing over a dishwasher gap with no support batten. The joint flexes every time the appliance door slams.
When to call a fitter (and Gas Safe)
Call a worktop fabricator for stone, complex templated shapes, or polished mason’s mitres you do not want to risk on an expensive board. Call a Gas Safe engineer to connect or move any gas hob or cooker. Use a Part P electrician for new cooker circuits and many extractor supplies. For plumbing on a new sink, isolate water and work carefully, or hire a plumber if the pipework needs altering.
Cluster sequence: base units → level → this job → join laminate where required → cut for a sink.
FAQ
How much should a kitchen worktop overhang?
Often roughly 20–40 mm beyond the door fronts so crumbs clear the doors, but match your range and handles. Too much overhang without support feels springy.
Do I fit the worktop before or after the sink cut-out?
Fit and scribe the top (and form joints) first, then mark and cut the sink opening from the actual bowl template on the dry-fitted top. See how to cut a worktop for a sink.
Can I replace a worktop without removing the units?
Sometimes, if the old top lifts clear and the units stay level. It is fiddly around sealed upstands and integrated sinks. This guide assumes a normal fit onto prepared carcasses; a dedicated strip-and-replace has more traps.
8 comments