How to Fit Kitchen Wall Units
25 June 2026 Joe HartleyIntermediate4–8 hours3 comments
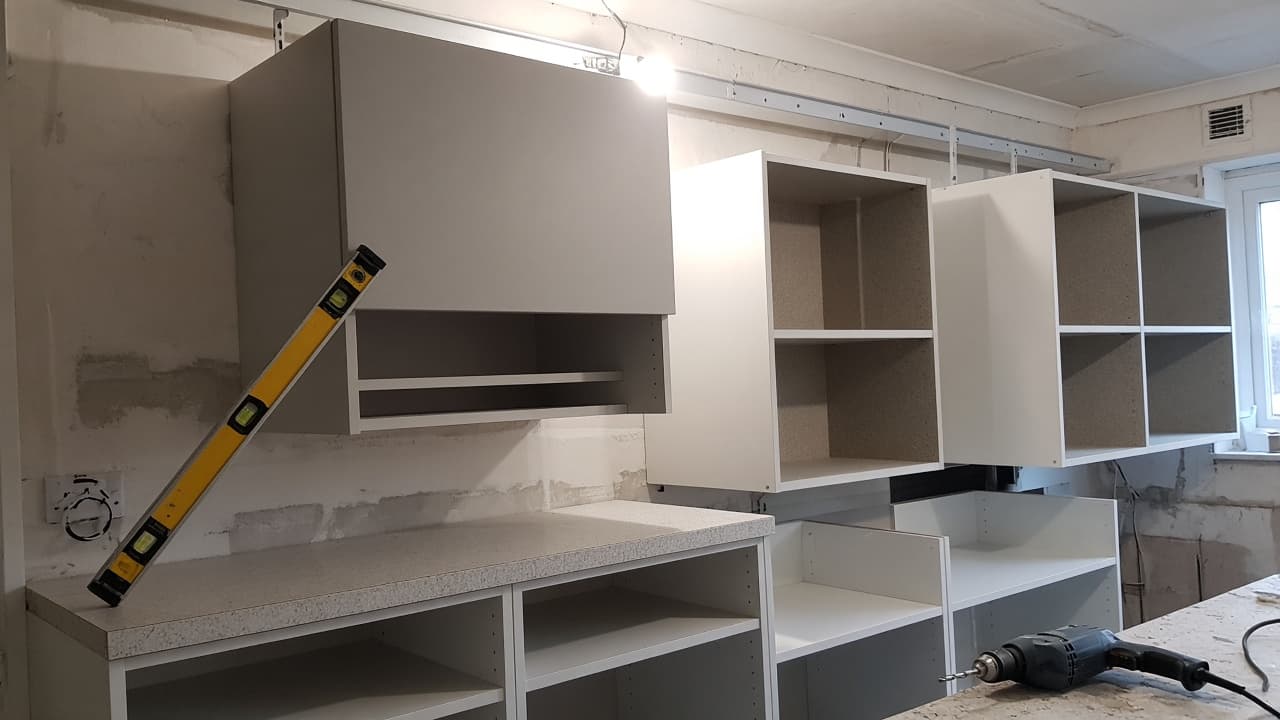
Tools
- Tape measure
- Spirit level or laser level
- Drill and masonry or wood bits
- Screwdrivers
- Wall plugs matched to the wall
- Pencil and string line
Kitchen wall units look fine until a door hangs open on its own or a carcass creaks when you put plates in. Most failures start with a bowed wall, weak plugs, or a hanging rail that was never packed true. Fit them after the base units are in and level, so you can set a sensible gap above the worktop.
Rail system or separate hangers
| Method | Best for | Watch-outs |
|---|---|---|
| Continuous hanging rail | Flat-pack ranges with metal hooks on the carcass back | The rail must be dead level; pack behind it where the wall hollows |
| Individual wall brackets | Older carcasses, one-off units, solid walls | Harder to keep a long run in one plane; mark heights carefully |
| Tall unit first | Runs that meet a larder or fridge housing | Use the tall unit as the height reference, then work outwards |
Check the maker’s drawing for the finished height above the worktop (often around 450–500 mm clear). Measure from the finished worktop plane, not from an uneven floor. If the worktop is not on yet, strike a temporary line from the top of the levelled base run and add the planned worktop thickness.
On plasterboard, do not hang a loaded wall unit on hollow-wall plugs alone. Hit studs, a timber noggin, or a proper rail fixed into structure. On brick or block, use masonry plugs sized to the rail screws. If you are unsure what is behind the plaster, drill a small test hole in a spot the rail will cover.
Tools and fixings
| Item | Notes |
|---|---|
| Hanging rail and hooks | Usually supplied with the range; check you have enough rail length |
| Wall plugs and screws | Match wall type and rail hole size; take a sample screw to the DIY store |
| Long spirit level | A short torpedo level lies about bowed walls |
| Packers / packing shims | Thin plastic or hardboard offcuts behind the rail |
| Connecting bolts | Screw adjacent carcasses together once hung |
Leave doors and shelves off while you hang. Empty carcasses are lighter and you can see through the back for drill positions.
Step-by-step
1. Mark the rail height
From your worktop (or temporary) reference line, measure up to the rail centreline given in the instructions. Snap or pencil a level line across the whole run. Mark stud or brick centres where you can.
2. Fix the rail
Hold the rail on the line and mark every fixing hole. Drill, plug, and screw. Where the wall dips, pack behind the rail until a long level reads true along its face. A rail that follows the plaster wave will print every bump into the door gaps.
3. Hang the first carcass
Start at a corner or against a tall unit. Hook the unit on, check it is tight to the rail, then adjust the hangers so the front edge is plumb and the underside sits parallel to the worktop line. Many hangers have separate up/down and in/out screws; nudge one at a time.
4. Join the run
Hang the next unit. Clamp the face frames or front edges flush, then fit connecting bolts through the pre-drilled holes in the carcass sides. Recheck level across both tops before you move on. Work along the run the same way.
5. Final fix and doors
Tighten hanger locks if the kit has them. Fit shelves. Hang doors and adjust the hinge screws for even gaps (usually about 2–3 mm). If a door fouls a neighbour, the carcasses are not in one plane; loosen connectors and re-pack rather than winding hinges to extremes.
Mistakes that pull units off the wall
- Fixing a rail only into plaster skim. The first full cupboard of tins finds the weak spots.
- Assuming the ceiling line is level and measuring down from it. Kitchens rarely are.
- Leaving a big gap to a bowed wall “for filler later” without packing the hangers. The unit rocks and the door gaps wander.
- Fitting wall units before the base run is level. Your clear gap then varies by 10 mm along the room.
When to call a kitchen fitter or electrician
Stop if the wall is crumbling, you hit a cable you cannot identify, or the only solid fixing is too shallow for the rail screws. Under-unit lighting often needs a Part P electrician if you are extending circuits. Gas hobs and cookers are Gas Safe work; do not move gas pipes yourself while chasing space for a wall unit above.
Related jobs in this cluster: fit kitchen base units, level kitchen base units, fit a kitchen worktop, join laminate worktops, cut a worktop for a sink.
FAQ
How high should kitchen wall units be above the worktop?
Follow the range instructions. A common finished clear gap is around 450–500 mm so you can use the worktop and still reach the bottom shelf. Measure from the finished worktop, not from the floor.
Can I hang wall units on plasterboard?
Yes, if you fix into studs, noggins, or a rail that reaches solid structure. Hollow-wall plugs alone are not enough for a loaded wall cupboard.
Should I fit wall units before or after the worktop?
Fit and level the base units first, hang the wall units to a height taken from that plane, then fit the worktop. Fitting wall units to a wavy base run locks the mistake in forever.
3 comments