How to Cut a Worktop for a Sink
4 July 2026 Joe HartleyIntermediate2–4 hours12 comments
Tools
- Sink template or the sink itself
- Pencil and masking tape
- Drill with flat bit (10–12 mm)
- Jigsaw with fine / reverse-tooth blade
- Spirit level and straight edge
- Silicone sealant and applicator
- Workbench clamps or trestles
A sink cut-out is where a worktop job goes wrong fastest. One optimistic freehand cut and you chip the laminate face or leave a gap the bowl never covers. Mark from the maker’s template, support the sheet properly, and seal the raw chipboard before water finds it.
This sits after you have sized and positioned the run. Fit the sheet first if you need that sequence: how to fit a kitchen worktop. Corner joints belong in how to join laminate worktops. Level the carcasses before you cut: how to level kitchen base units.
Inset, undermount, or Belfast?
| Sink type | What you cut | DIY reality on laminate |
|---|---|---|
| Inset (drop-in) | Opening slightly smaller than the bowl rim; rim sits on the top face | Standard DIY job. Follow the paper template or reverse the bowl as a guide |
| Undermount | Opening to the finished rim line; bowl fixed from below | Fine on solid timber or stone. Avoid on chipboard laminate unless the maker explicitly allows it |
| Belfast / butler | Large opening plus apron recess against the cabinet face | Plan the unit carcass and front rail before you cut. Not a last-minute hole |
Most UK DIY-store laminate worktops are built for inset sinks. If the bowl is undermount-only and the worktop is chipboard core, stop and change sink or worktop rather than fighting the material.
Check the cabinet run under the cut-out. You need clear space for the bowl depth, waste trap, and tap tails. A dishwasher either side is fine; a full-height oven housing under the sink is not.
What you need on the bench
| Item | Notes |
|---|---|
| Worktop section | Dry-fit on the units before cutting if you can. Mark front edge and wall edge clearly |
| Sink + template | Use the paper template supplied. If there is none, reverse the bowl and draw inside the rim line as the maker states |
| Masking tape | Cover the cut line on the show face to reduce chip-out |
| Fine jigsaw blade | Reverse-tooth or laminate blade for the top face; keep spare blades |
| Flat bit | Corner starter holes so the jigsaw can drop in cleanly |
| Clear silicone | Seal every cut edge of chipboard before the sink goes in |
Cut on trestles with the finished face up if your blade is reverse-tooth (teeth that cut on the down stroke protect the laminate). With a standard blade, many people flip the sheet and cut from the underside so tear-out hits the unseen face. Pick one method and stick to it for the whole opening.
Mark and cut the opening
1. Position the sink on the units
Set the worktop on the base units (or mark on the fitted sheet). Measure from the front edge so the sink rim clears the door and drawer fronts when they open. Leave enough meat behind the bowl for the tap hole and any soap dispenser. Typical inset bowls want at least 50 mm of solid worktop behind the cut-out to the wall; check your tap and upstand.
2. Transfer the template
Tape the template square to the front edge. Or place the inverted sink, centre it, and draw the cut line the maker specifies (often a few millimetres inside the rim). Double-check left-right against the waste outlet and the cupboard below. Mark the tap hole separately with the tap’s own template; do not guess a 35 mm monobloc hole by eye.
3. Drill the corners
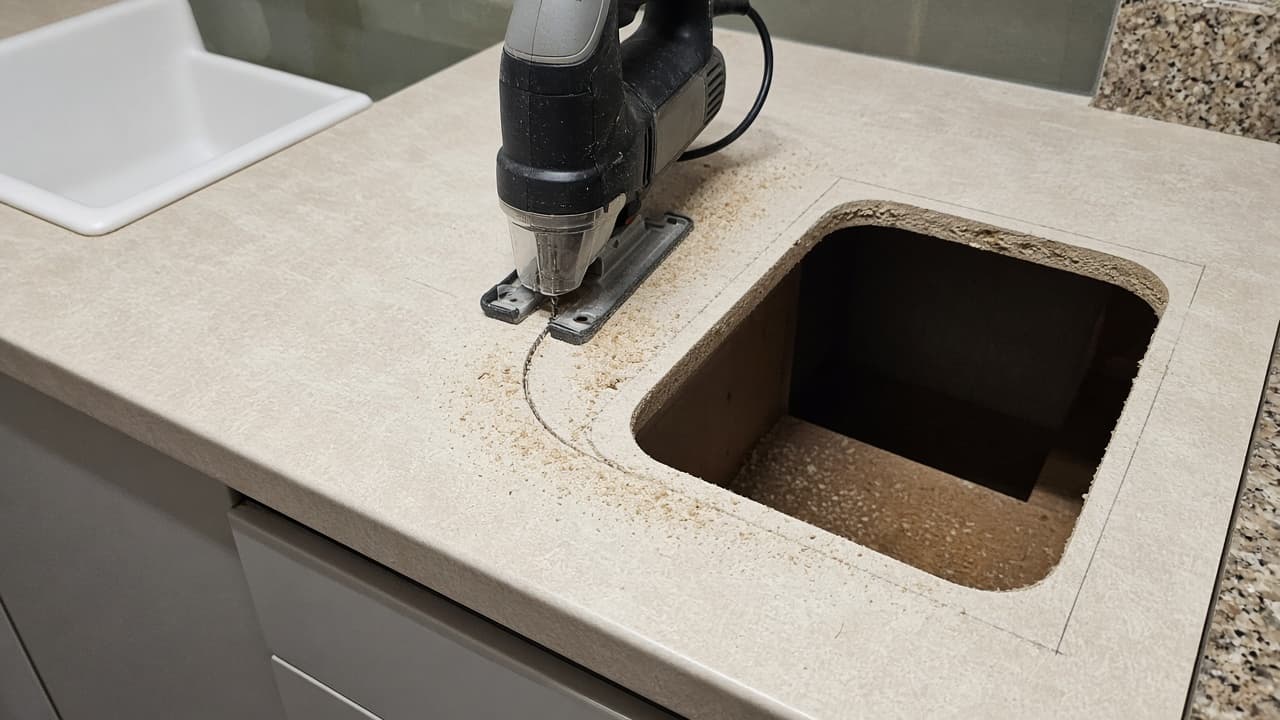
Drill a hole inside each corner of the cut-out, large enough for the jigsaw blade. Stay inside the waste side of the line. The corners are where blades bind and wander if you try to turn too tightly without a starter hole.
4. Cut with the jigsaw
Clamp a sacrificial straight edge if you want a cleaner long run. Cut slowly, keeping the shoe flat. Pause to clear dust so you can still see the pencil line. Do not force the blade around a sharp corner; stop and restart from the next starter hole if needed. Support the waste piece as you finish the last cut so it does not tear a triangle out of the laminate as it drops.
5. Trial-fit the sink
Drop the bowl in dry. The rim should sit flat all round with a small, even overhang of the flange onto the worktop. If one side binds, ease that edge with a coarse file or a careful second pass. Do not open the hole so wide that the rim looks skimpy; silicone will not hide a missing flange.
6. Seal the raw edge
Chipboard soaks water. Wipe dust off the cut edge and run a continuous bead of clear silicone over every millimetre of exposed core, including corners and the tap hole. Smooth it into the edge. Let it skin before you bed the sink for real. This step matters more than a perfect pencil line.
Cuts that usually go wrong
- Cutting before the worktop is joined or fully supported, so the sheet flexes and the blade wanders.
- Ignoring the template and cutting to the outside of the rim. The sink then falls through or sits on a wafer of laminate.
- Skipping edge seal. The first drip under the rim swells the chipboard into a soft, brown ridge.
- Cutting the tap hole after the sink is silicone-bedded, with no room to drill cleanly.
When to stop and get a kitchen fitter
Call a fitter for stone, quartz, or compact laminate that needs a specialist cutter, for undermount bowls on anything other than a maker-approved solid surface, or if the cut-out would leave a thin strip of worktop between sink and hob that feels flexible under hand pressure. Electrical work for a waste disposal unit is a separate job for a Part P electrician if new circuitry is involved.
Related reading: fit a kitchen worktop, join laminate worktops, fit kitchen base units, and fit kitchen wall units.
FAQ
Can I cut a laminate worktop with a jigsaw?
Yes. Use a fine or reverse-tooth blade, support the sheet, and go slowly. A circular saw with a guide is better for long straight edges when fitting the sheet; a jigsaw is the right tool for the sink opening.
How big should the sink cut-out be?
Follow the sink maker’s template. As a rule the opening is smaller than the outer rim so the flange rests on the worktop. There is no single UK size; bowls vary by brand and bowl count.
Do I seal the cut edge before fitting the sink?
Always on chipboard-core laminate. Silicone on the raw edge first, then bed the sink on a fresh bead as the sink instructions say. Unsealed edges fail from the first slow leak under the rim.
12 comments