How to Insulate a Loft Hatch
27 June 2026 Joe HartleyBeginner1–2 hours3 comments
Tools
- Tape measure
- Utility knife or scissors
- Rigid foam board or loft quilt offcut
- Suitable adhesive or mechanical fixings for the lid type
- Self-adhesive foam or rubber draught seal
- Screwdriver (if hinges or catches need adjusting)
- Dust mask and gloves if cutting mineral wool
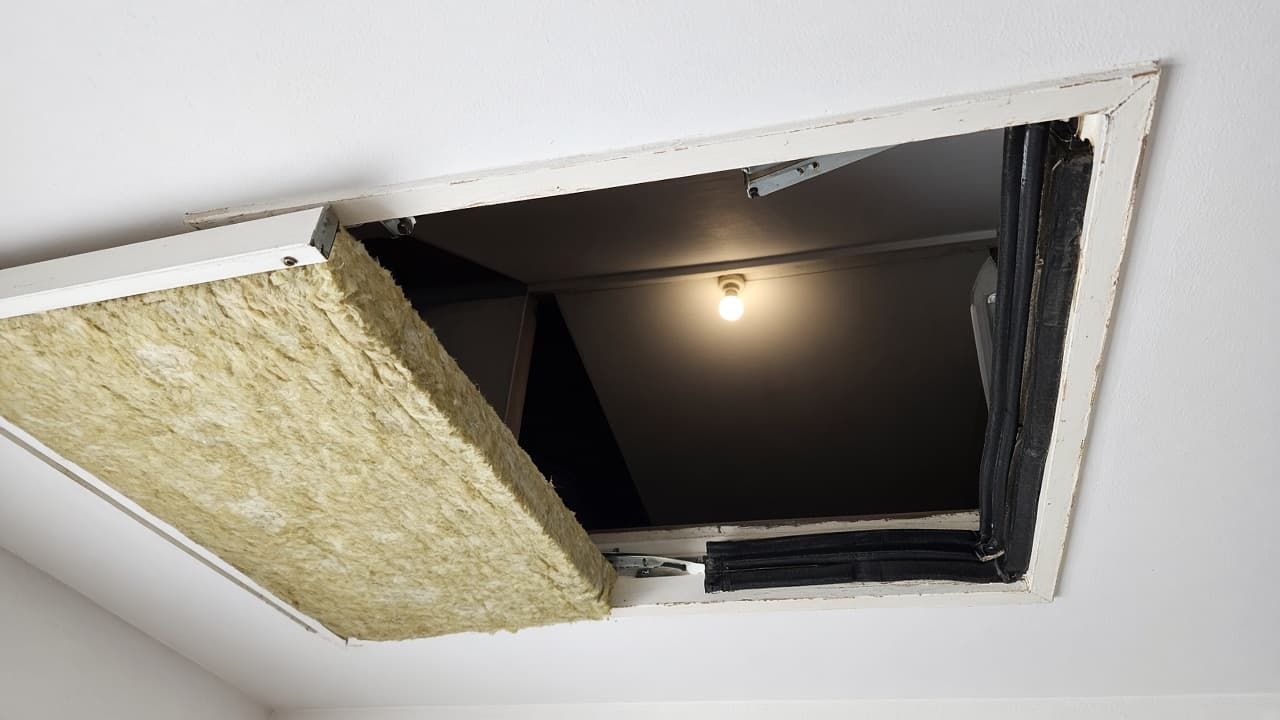
A bare loft hatch is a hole in an otherwise insulated ceiling. How to insulate a loft hatch is a short job: put insulation on the lid (or replace a thin lid), then seal the perimeter so warm air from the landing does not stream into the loft. Do this after the loft quilt is down, or you will keep climbing through a half-finished floor.
Window condensation and wall mould are separate moisture jobs. If the landing feels icy from gaps but glass still streams, see how to stop condensation on windows and how to treat mould on walls safely.
Hatch types and what works
| Hatch | Sensible approach |
|---|---|
| Simple timber push-up lid | Stick or screw rigid foam on the loft face; add a compression seal on the frame rebate |
| Hinged insulated hatch | Check existing foam thickness; top up seals; replace if the core is thin and cold |
| Drop-down loft ladder hatch | Insulate the lid carefully so the ladder still stows; seals on the frame matter as much as the lid |
| Plastic proprietary hatch | Use the maker’s insulation kit or compatible foam; do not glue something that stops the catch closing |
Feel the lid on a cold day. If the room-side face is icy compared with the ceiling, you have found a heat leak. Parent loft job: how to insulate a loft.
Materials that actually stay put
| Material | Notes |
|---|---|
| Rigid PIR or polystyrene foam board | Easy to cut to the lid; light; often better than floppy wool on a moving lid |
| Mineral wool offcut in a simple bag or tray | Works if held so it cannot sag onto your head when the hatch opens |
| Self-adhesive foam / rubber seal | On the frame rebate or lid edge where it compresses when shut |
| Catch and hinge tweak | A lid that does not pull down tight will not seal, however thick the foam |
Avoid dangling loose quilt that snags the ladder or sheds fibres onto the landing every time you open up.
Step-by-step
1. Measure the loft face of the lid
Remove or prop the lid safely. Measure the area you can cover without fouling hinges, ladder mechanism, or the rebate that sits on the frame. Leave a small clearance so the lid still drops home.
2. Cut and fix the insulation
Cut foam board to size. Fix with a compatible adhesive, or screw through with large washers if the lid is timber and the maker allows it. Keep fasteners short enough not to poke through the decorated face. If you use wool, contain it so it stays on the loft side when the hatch hangs open.
3. Check the close
Refit the lid. Open and close a few times. The insulation must not scrape the frame or stop the catch engaging. Trim any proud edges.
4. Fit draught seals
Clean dust off the rebate. Stick compression seal where the lid meets the frame so it squashes evenly when shut. Gaps at one corner usually mean a twisted lid or a seal that is too fat on one side.
5. Test on a cold, windy day
Hold a hand around the perimeter or use a stick of incense. Moving air means more seal or a better catch pull-down. Also check you have not left a wool waterfall from the loft floor hanging into the hatch opening; trim the loft quilt so it meets the hatch trim neatly after laying between and over joists.
Common mistakes
- Gluing foam so thick the catch never latches.
- Sealing the lid but leaving a 10 mm gap at one corner because the frame is out of square.
- Mineral wool stapled loosely so it drops on your face when the hatch opens.
- Forgetting the loft ladder hinges need clearance.
- Insulating the hatch while the loft floor around it is still bare, then tearing the new lid foam every trip.
When to call a pro
Replace the whole hatch unit if the timber is rotten, the plastic frame is cracked, or a combined ladder hatch will not seal after honest adjustment. Call a joiner for a custom insulated hatch in an awkward opening. Electrics in the hatch area (lights, sockets on the landing ceiling) stay with a Part P electrician if you need alterations.
Cluster links: how to insulate a loft for the full loft plan, how to lay loft insulation rolls and how to lay loft insulation between and over joists for the floor quilt, then how to draught-proof windows and doors for house draughts downstairs.
FAQ
Should insulation go on the room side or the loft side of the hatch?
Almost always the loft face of the lid. That keeps the decorative landing face tidy and puts the insulation in the cold space. Room-side pads look temporary and get knocked.
How thick should loft hatch insulation be?
As thick as will still let the lid close and latch. Even 25–50 mm of rigid foam plus a good seal beats a bare 12 mm plywood lid. Matching the full loft depth on a hinged lid is often impossible; seals then matter more.
Why is there still a draught after insulating the lid?
The perimeter seal is missing, compressed unevenly, or the catch does not pull the lid down. Fix the seal and latch before buying thicker foam.
3 comments