How to Replace a TRV
6 August 2026 Joe HartleyIntermediate1–2 hours20 comments
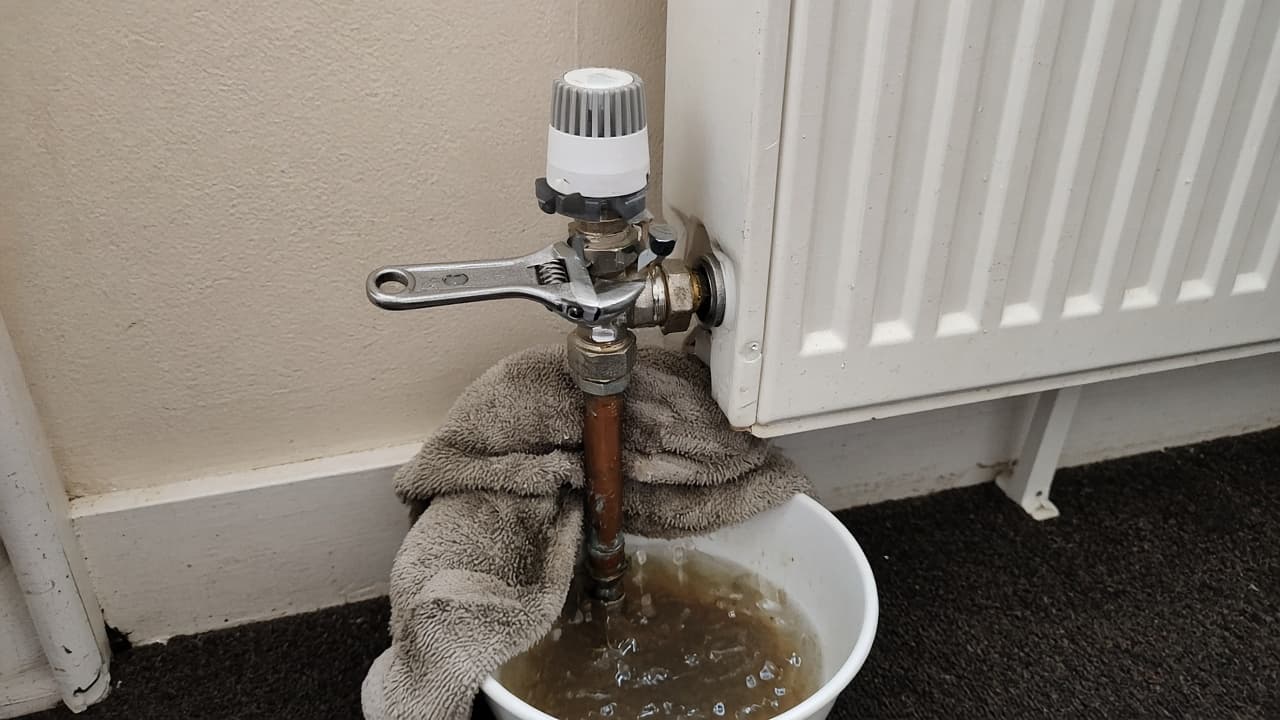
Tools
- Adjustable spanners (two preferred)
- Radiator bleed key
- Bucket and towels
- Replacement TRV body and head
- PTFE tape
- Pipe grips or valve nut spanner
- Old pan or tray under the valve
A thermostatic radiator valve (TRV) that sticks, weeps, or never throttles heat is worth replacing as a whole valve job, not just fiddling with the plastic head. This is pipework and radiator isolation, not boiler work. Stay on the valve and tails; anything involving gas pipe, the boiler case, or sealed-system components beyond topping up pressure after draining is Gas Safe territory.
Head only, or the whole valve?
| Symptom | Likely job |
|---|---|
| Head will not turn; pin under the head is stuck | Free the pin first; replace head if the mechanism is dead |
| Weep from the valve body, union, or gland | Full TRV body swap (this guide) |
| Radiator never gets warm even with head on max | Check lockshield balance and air before blaming the TRV |
Many “smart” heads screw onto a standard UK 15 mm angled body with an M30 or brand-specific collar. If only the head is broken and the body is dry, you can often swap the head without draining. Once brass weeps or the seat is wrecked, plan a body change.
Related jobs in this cluster: bleed a radiator after you refill, and replace a lockshield valve if the other end is also tired.
Tools and parts
| Item | Notes |
|---|---|
| Matching TRV | Angled or straight to match the old body; 15 mm compression is common on UK copper tails |
| PTFE tape | On male threads the maker specifies (often the radiator tail). Do not pack PTFE into a compression olive seat |
| Two spanners | Hold the valve body still while you turn the nut; twisting the copper is how you get new leaks |
| Bleed key | Air out after refill |
| Bucket / towels | Even a “drained” rad holds more sludge than you expect |
Job-specific detail: The plastic TRV head often hides a tiny spring pin. If you only need a new head, remove the head, press the pin in and out a few times with a fingernail, then fit the new head with the room cold and the head set to max so it does not fight a hot pin.
Step-by-step
1. Decide how you will isolate
For one radiator: close the TRV (or remove the head and cap the valve shut if you have a blanking cap), close the lockshield fully after counting the turns (write the number down), then open the bleed screw into a towel to drop residual pressure. For a full drain of that rad, undo the TRV union into a tray once both ends are shut and catch the water. On a sealed system, note the boiler pressure before you start so you can restore it later with the filling loop (filling loop use is fine; do not open the boiler casing or alter gas parts).
2. Support the pipe and undo the TRV
Put a pan under the valve. Use one spanner on the valve body and one on the nut. Undo the union to the radiator first, then the compression nut on the copper tail. Ease the old valve off. Keep the olive if it is sound and the new valve accepts it; otherwise cut back carefully and fit a new olive as the valve instructions allow.
3. Prepare the new body
Clean paint and old jointing compound off the radiator union face. Wrap PTFE on threaded male parts where the maker specifies it (often the radiator tail thread, not over the olive seat). Do not pack PTFE into a compression olive seat; that joint seals on the olive.
4. Fit and tighten
Offer the new TRV up square. Hand-start both nuts, then tighten firmly while holding the body so the copper does not twist. The valve should sit with the head clear of the wall and skirting so the sensor is not jammed against cold plaster.
5. Open up, refill, and bleed
Return the lockshield to the same number of turns you noted. Open the TRV. Restore system pressure if you drained into a sealed system. Heat on, then bleed the radiator until water, not air, comes out. Check every joint with kitchen towel for a slow weep.
6. Fit the thermostatic head
Set the head to the maker’s fitting position (often max), push or screw it onto the body until it clicks or seats, then set your usual number. Leave space around the head; curtains and boxing fool the sensor into thinking the room is warmer than it is.
Mistakes that cause a return visit
- Forgetting the lockshield turn count, then wondering why the room never balances again.
- Spinning the valve body with one spanner and ovalising the copper behind the skirting.
- PTFE on the olive seat instead of on the threads that need it.
- Fitting a straight valve where an angled one cleared the wall, so the head fouls the plaster.
- Calling the job done without bleeding; the top of the rad stays cold and you blame the new TRV.
When to stop and call a Gas Safe engineer or plumber
Stop if you need to break into primary boiler pipework, replace a motorised valve, work on gas pipe, or open the boiler. Call a plumber (or heating engineer) if copper is pinholed, olives will not seal, you cannot isolate without draining the whole house and you are not set up for it, or pressure will not hold after a careful refill. Radiator valves on the water side are DIY-fair; gas and sealed boiler internals are not.
More in this cluster: bleed a radiator, replace a lockshield valve, fix a cold radiator.
FAQ
Do I need to drain the whole heating system to replace a TRV?
Not always. If you can shut the TRV and lockshield tightly, you can often drop just that radiator’s contents into a tray. Whole-system draining is for when isolation fails or you are changing several valves in one go.
Can I replace only the TRV head?
Yes, if the brass body is dry and the pin moves. Head-only swaps avoid draining. Weeping bodies, seized mechanisms inside the brass, or wrong thread standards need a full valve. Match the collar (often M30) to the head you buy; brand-specific collars are common on older valves.
Why is the radiator still cold after a new TRV?
Air at the top, a lockshield still closed, sludge, or a head fitted while forced shut on a hot pin are the usual culprits. Bleed first, confirm both valves are open to the settings you want, then look at balance across the system.
20 comments