How to Lay Laminate Flooring
9 June 2026 Joe HartleyIntermediate1–2 days19 comments
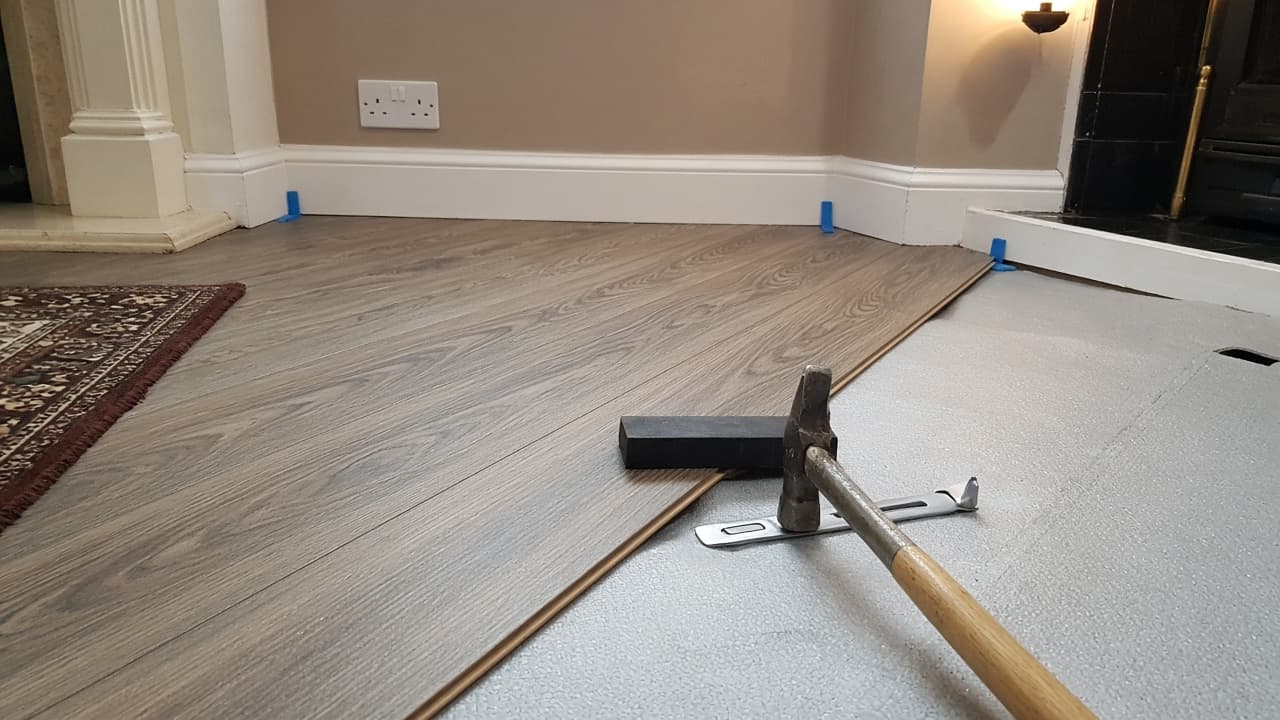
Tools
- Tape measure and pencil
- Spirit level
- Spacers (10–12 mm)
- Laminate cutter, handsaw, or jigsaw
- Pull bar and tapping block
- Utility knife
Laying laminate flooring is mostly prep and patience with the first few rows. Click-lock boards float on underlay; they expand and contract with the room, so a clear perimeter gap matters more than a perfect pattern match. Get the base flat and dry, then the click joints usually behave.
For concrete slabs with moisture risk, use how to lay laminate on concrete. On suspended timber, see how to lay laminate on floorboards.
Pick the right approach for your floor
| Subfloor | What to do first |
|---|---|
| Dry, flat screed or concrete | DPM / underlay with vapour barrier if the maker requires it; then lay |
| Old floorboards | Fix bounce and squeaks; often overlay with plywood before underlay |
| Existing vinyl or tiles | Only if sound, flat, and the laminate maker allows it over that surface |
| Narrow hallway with several doors | Plan undercuts and thresholds early; see the hallway guide |
Acclimatise sealed packs in the room for at least 48 hours (follow the pack). Typical UK plank sizes are around 1200–1380 mm long and 190–200 mm wide; buy 10% extra for cuts and mistakes, more for diagonal layouts.
Kit and materials
| Item | Notes |
|---|---|
| Laminate packs | Same batch / shade code if you can |
| Underlay | Matched to subfloor; see how to fit underlay for laminate |
| Spacers | 10–12 mm at walls, pipes, and fixed thresholds |
| Scotia or beading | Covers the gap if skirting stays in place |
| Pull bar and tapping block | Protects the click profile; never hammer the tongue bare |
Full kit list: tools needed to lay laminate flooring. Choosing foam vs combined DPM underlay: how to choose laminate underlay UK.
Step-by-step
1. Clear and check flatness
Strip carpet, gripper, and loose debris. Sweep thoroughly; grit under underlay telegraphs as soft clicks forever. Check the floor with a spirit level and a long straight edge. High spots over about 3 mm in 2 m need levelling or grinding; hollows need a suitable compound. Laminate hates a wavy base more than a slightly imperfect cut.
2. Decide direction and dry-lay the first row
Most rooms look best with planks running along the longest wall, or parallel to the main light. Measure the room width and work out the last-row width. If that strip would be under about 60 mm, rip the first row narrower so start and finish share the awkward cut. Leave the 10–12 mm expansion gap in your maths from the start.
3. Fit underlay
Roll underlay wall to wall, butt joints (do not overlap foam unless the product says to), and tape seams as instructed. Keep the vapour film face the right way up if it has one. Trim flush at doorways where a threshold bar will sit. Detail guide: fit underlay for laminate.
4. Lay the field
Place spacers against the walls. Click the first row tongue-to-groove along the long edges, then start the next row with a cut offcut so end joints stagger by at least 300 mm. Use the tapping block on the long edge and the pull bar on the last board against the wall. Work across the room; keep joints tight and wipe dust out of the click profile as you go.
5. Cut the last row and detail openings
Rip the final row to width, still leaving the expansion gap. At doorways, undercut linings so boards slide under the architrave rather than notching a messy U around it. Method: how to undercut door frames for flooring and how to cut laminate around door frames. Fit door bars or T-profiles where rooms change floor type. Remove spacers and cover the perimeter with skirting refitted, or scotia if the skirting stayed up.
Mistakes that show up weeks later
- Leaving less than 10 mm at walls “because the skirting will hide it”. Boards then peak or open at joints when the heating comes on.
- Running continuous laminate through several rooms without a break at doorways on large footprints. Check the manufacturer’s maximum run length.
- Mixing packs from different dye lots in the same field of view.
- Gluing a floating floor down “to stop it moving”. Movement belongs in the gap, not in stressed click joints.
When to call a flooring fitter
Stop if the screed is damp (black poly sheeting test still wet after a day, or a meter reading outside the maker’s limit), if the floor needs structural repair, or if you are over electric underfloor heating and the laminate is not rated for it. Large open-plan runs with complex thresholds are also fair work for a fitter if your time budget is a weekend and the room is not cooperating.
Hallway traffic and door bars: how to lay laminate in a hallway. DIY versus trade spend: cost to lay laminate flooring DIY vs fitter.
FAQ
What is the basic sequence for laying laminate?
Prep a flat, dry subfloor, fit suitable underlay, leave a 10–12 mm expansion gap, click rows with staggered end joints, then undercut door frames and finish with skirting or scotia. Concrete and floorboards each need their own prep path.
Do I need to remove skirting?
Not always. You can leave skirting and cover the gap with scotia or quadrant. Removing skirting and refitting it over the laminate looks cleaner if the skirting comes off without wrecking the plaster.
How long should laminate acclimatise?
Most UK packs ask for about 48 hours in the room, sealed, flat, and away from direct heat. Cold garages and just-delivered packs laid straight away are a common cause of later gaps.
19 comments