How to Drill Ceramic Tiles Without Cracking
15 August 2026 Joe HartleyIntermediate10–20 minutes per hole17 comments
Tools
- Cordless drill (no hammer)
- Spear-point or carbide tile bit
- Masking tape
- Spirit level or template
- Wall plugs sized to the bit
- Spray bottle of water (optional)
Glazed ceramic tile fails at the surface first. The hard glaze wants to chip; the body underneath is softer. Most cracks come from hammer action, a blunt masonry bit skating across the face, or pushing hard before the glaze is broken. Slow the start, and ceramic usually cooperates.
If you are still tiling rather than fixing through finished tiles, lay and set first: how to tile a splashback or how to tile a bathroom wall. Drill after the adhesive has cured.
Ceramic vs porcelain (and when to rethink)
| Surface | Notes |
|---|---|
| Glazed ceramic wall tile | Spear-point or tile bit, low speed, no hammer |
| Porcelain | Harder; use a quality tile/porcelain bit, more patience, more cooling pauses |
| Natural stone | Often needs specialist bits; test on an offcut |
| Glass mosaic | High crack risk; prefer fixing into grout lines or a board behind |
Prefer a fixing that lands in a grout joint when the layout allows. Grout drills cleaner than glaze. If the bracket must sit on a tile centre, mark carefully and drill the glaze with almost no pressure.
Buy a spear-point or carbide tile bit sized to your wall plug. A blunt masonry bit in hammer mode is how most DIY cracks start.
Step-by-step
1. Mark, tape, and level
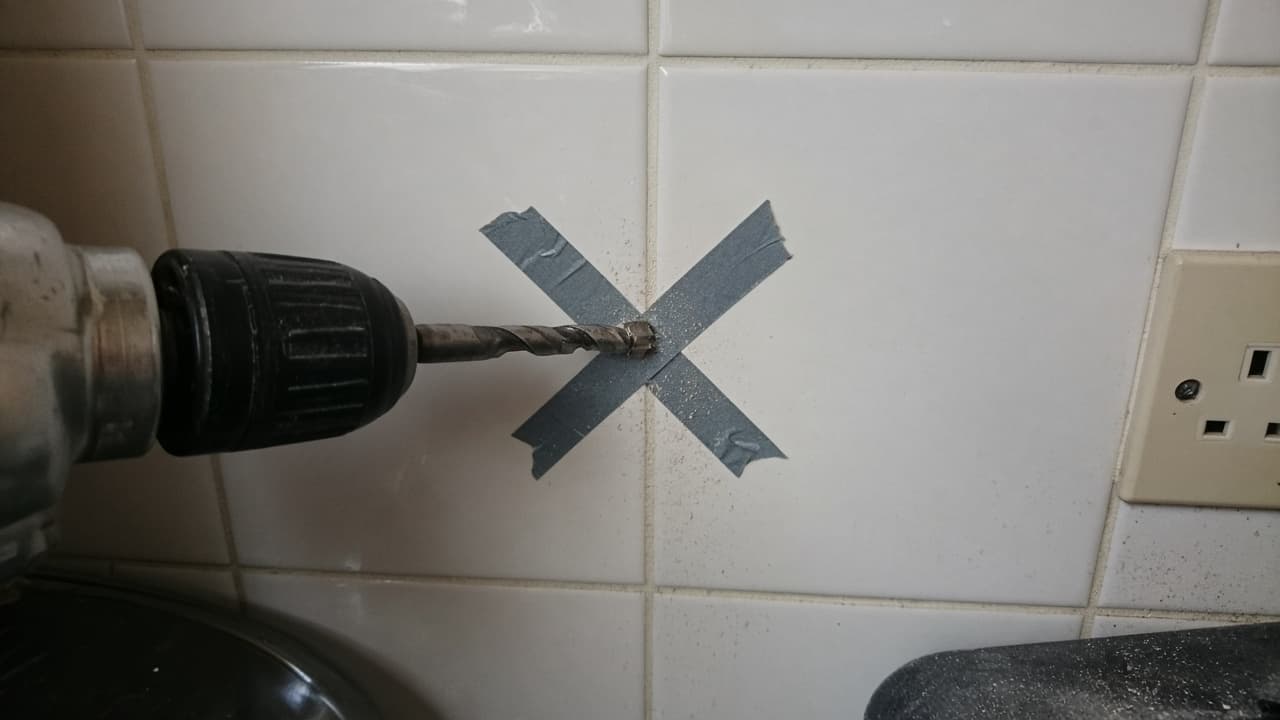
Mark the hole. Stick a cross of masking tape over it so the bit does not skate. Check alignment with a spirit level or a paper template if you are drilling a pair of holes for a rail or shelf. See how to use a spirit level properly if the run has to read true.
2. Switch off hammer mode
Set the drill to rotary only. Hammer mode is for masonry behind the tile once the glaze is open, and even then many tilers prefer to finish with rotary and a masonry bit after the tile is pierced. Start with the tile bit only.
3. Break the glaze at low speed
Hold the drill square to the wall. Start slow. Let the spear tip score a dimple through the glaze before you increase speed. Do not lean on the tool. A light mist of water on the bit (or short pauses) keeps the tip cooler on larger holes.
4. Open the hole and change bit if needed
Once through the glaze and body, you will feel the bit reach adhesive or plasterboard/masonry behind. For solid walls, swap to a masonry bit of the same diameter if the tile bit stalls, still without hammer until you are clear of the tile face. Blow or vacuum dust so the wall plug seats fully.
5. Fit the plug flush and test the screw
Push the wall plug in so the collar sits flush with the tile face, not proud on the glaze. Drive the screw until snug. Over-tightening can crack a thin ceramic face from behind.
Mistakes that spider the glaze
- Using hammer from the first touch on the tile face.
- A worn masonry bit skidding until it chips a crescent.
- Drilling at a slant so the hole ovalises and the plug wedges unevenly.
- Forcing a large hole in one go instead of stepping up bit sizes on porcelain.
- Ignoring pipes and cables. Use a detector; bathrooms often hide supplies behind splash zones.
When to call a tiler or plumber
Call help if a crack runs across a waterproofed shower wall, if you need large holes for pipework through a tanked area, or if you suspect pipes behind the fixing line. Part P and water regs still apply for electrical and plumbing alterations nearby.
Related kit skills: how to use a spirit level properly, how to use a multi-tool for DIY, and how to use a mitre saw safely.
FAQ
Can I drill ceramic tiles with a normal masonry bit?
You can, but a sharp spear-point or tile bit is safer on glaze. A masonry bit in hammer mode is the usual way people crack tiles. Rotary only, and start gently.
Should I drill into the tile or the grout?
Grout is kinder when the fixing position allows it. Centre-of-tile holes are fine if you break the glaze slowly and keep the drill square.
Why did the tile crack after the screw went in?
Often the plug was short or the hole was shallow, so the screw bottomed and forced the tile. Or the plug sat proud and the screw head pinched the glaze. Clear dust, deepen the hole slightly, and seat the plug flush.
17 comments